 I haven’t always taken great care of my skin as a teen/young adult, but in the last five years I’ve definitely become so much more aware of trying to care for my body in better ways. That includes cleaner beauty products in my routine and washing my face is now a must before bed.
I also have pretty long hair and lots of little baby hairs in the front of my hairline that get weird (or weirder I should say) if they get wet, so a spa headband is totally necessary when doing my face wash routine at night. I’ve always wanted one of those cute versions with a giant bow on top, so I decided to make my own and I love how it came out!
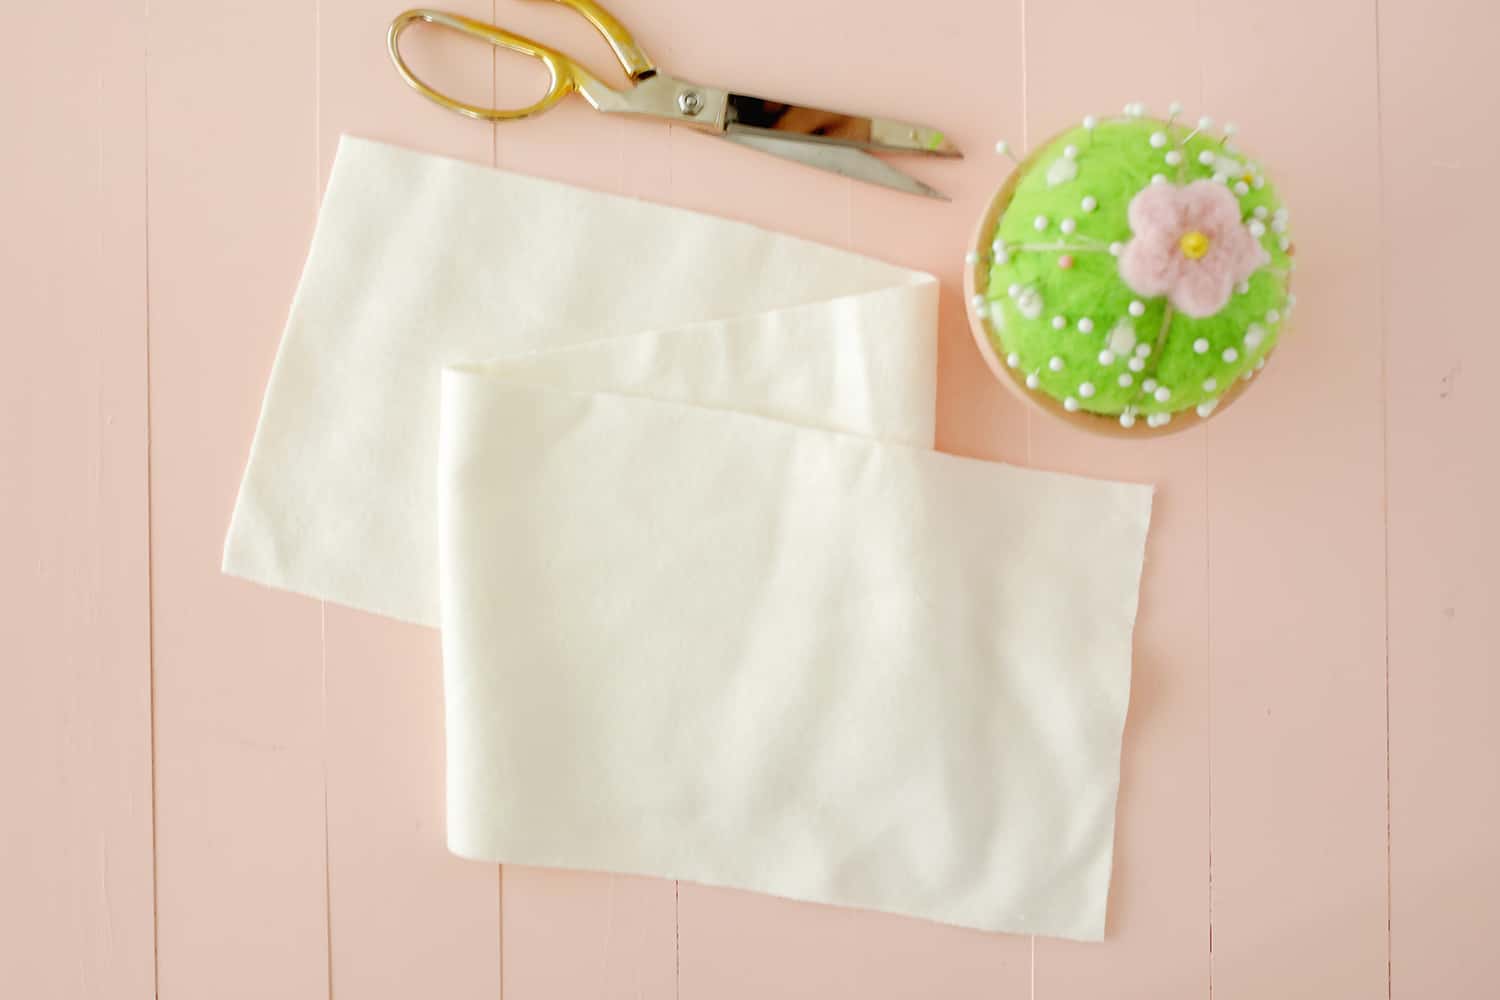
Supplies:
–cotton flannel fabric (a quarter yard)
-straight pins and fabric scissors
–1/2″ elastic (two pieces 18″ long)
–1/4″ elastic (two pieces 18″ long)
-sewing machine
 Cut a large rectangle of flannel that is 6″ x 27″ for the main body of the headband. If you have a serger sewing machine, sew around the outside of the rectangle to keep the edges from fraying, and if you don’t have a serger, use a zig-zag stitch on your regular machine around the edges instead.
 You’ll want to make your long rectangle into a loop for the headband, so fold it in half, line up the edges, and pin them together. Sew with a 1/2″ seam allowance and then press your seams flat and top stitch each flap flat so the underside looks like what you see above.
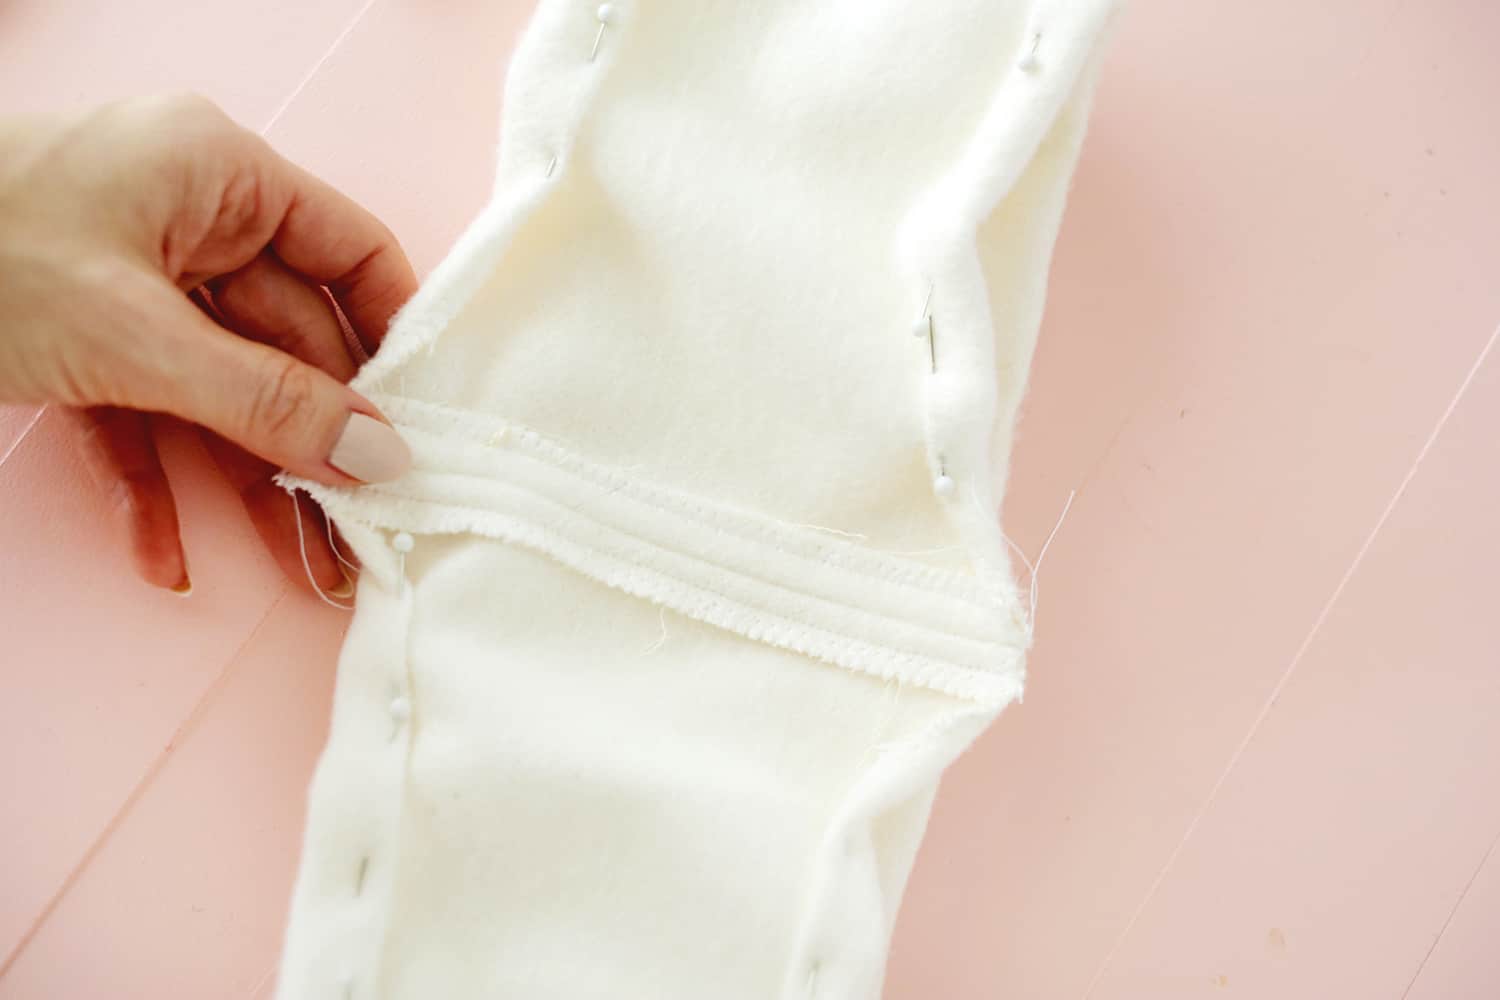
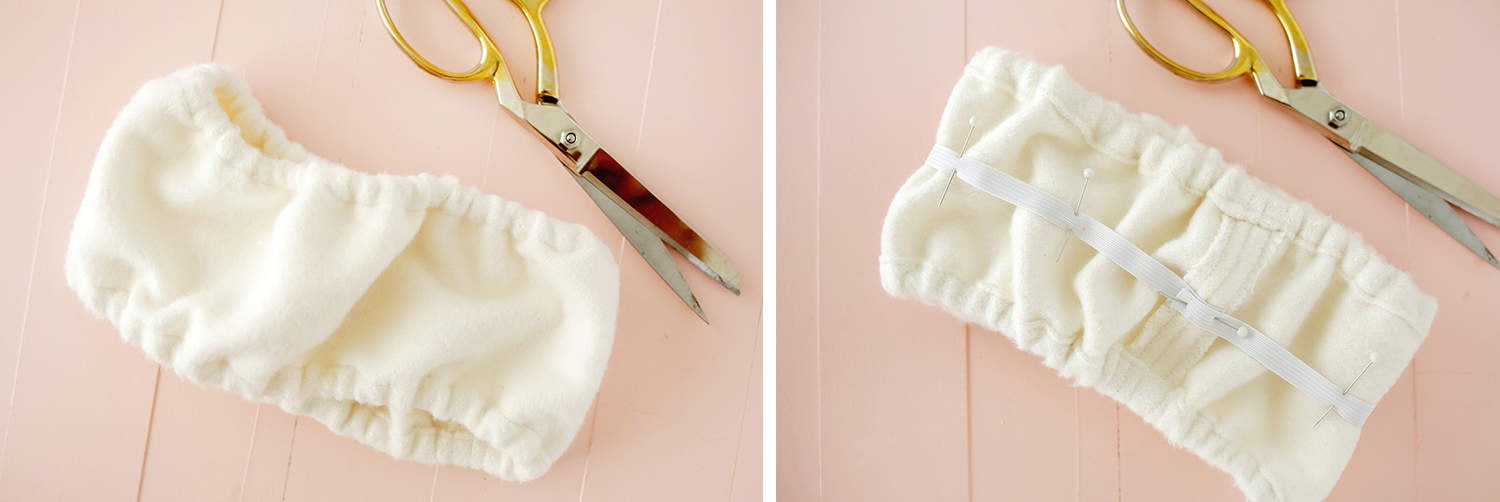
 Fold under your zig-zag edge on the top and bottom edge of the headband and pin so that you’ll have a 1/2″ channel of space with which to thread your 1/2″ elastic through.
 Sew all the way around the folded edges with the smallest seam allowance you can while leaving 1″ gap in the top and bottom channels to add your elastic through. Pin a large safety pin onto one side of your elastic and pin the other side to just outside of your gap opening to keep it in place.
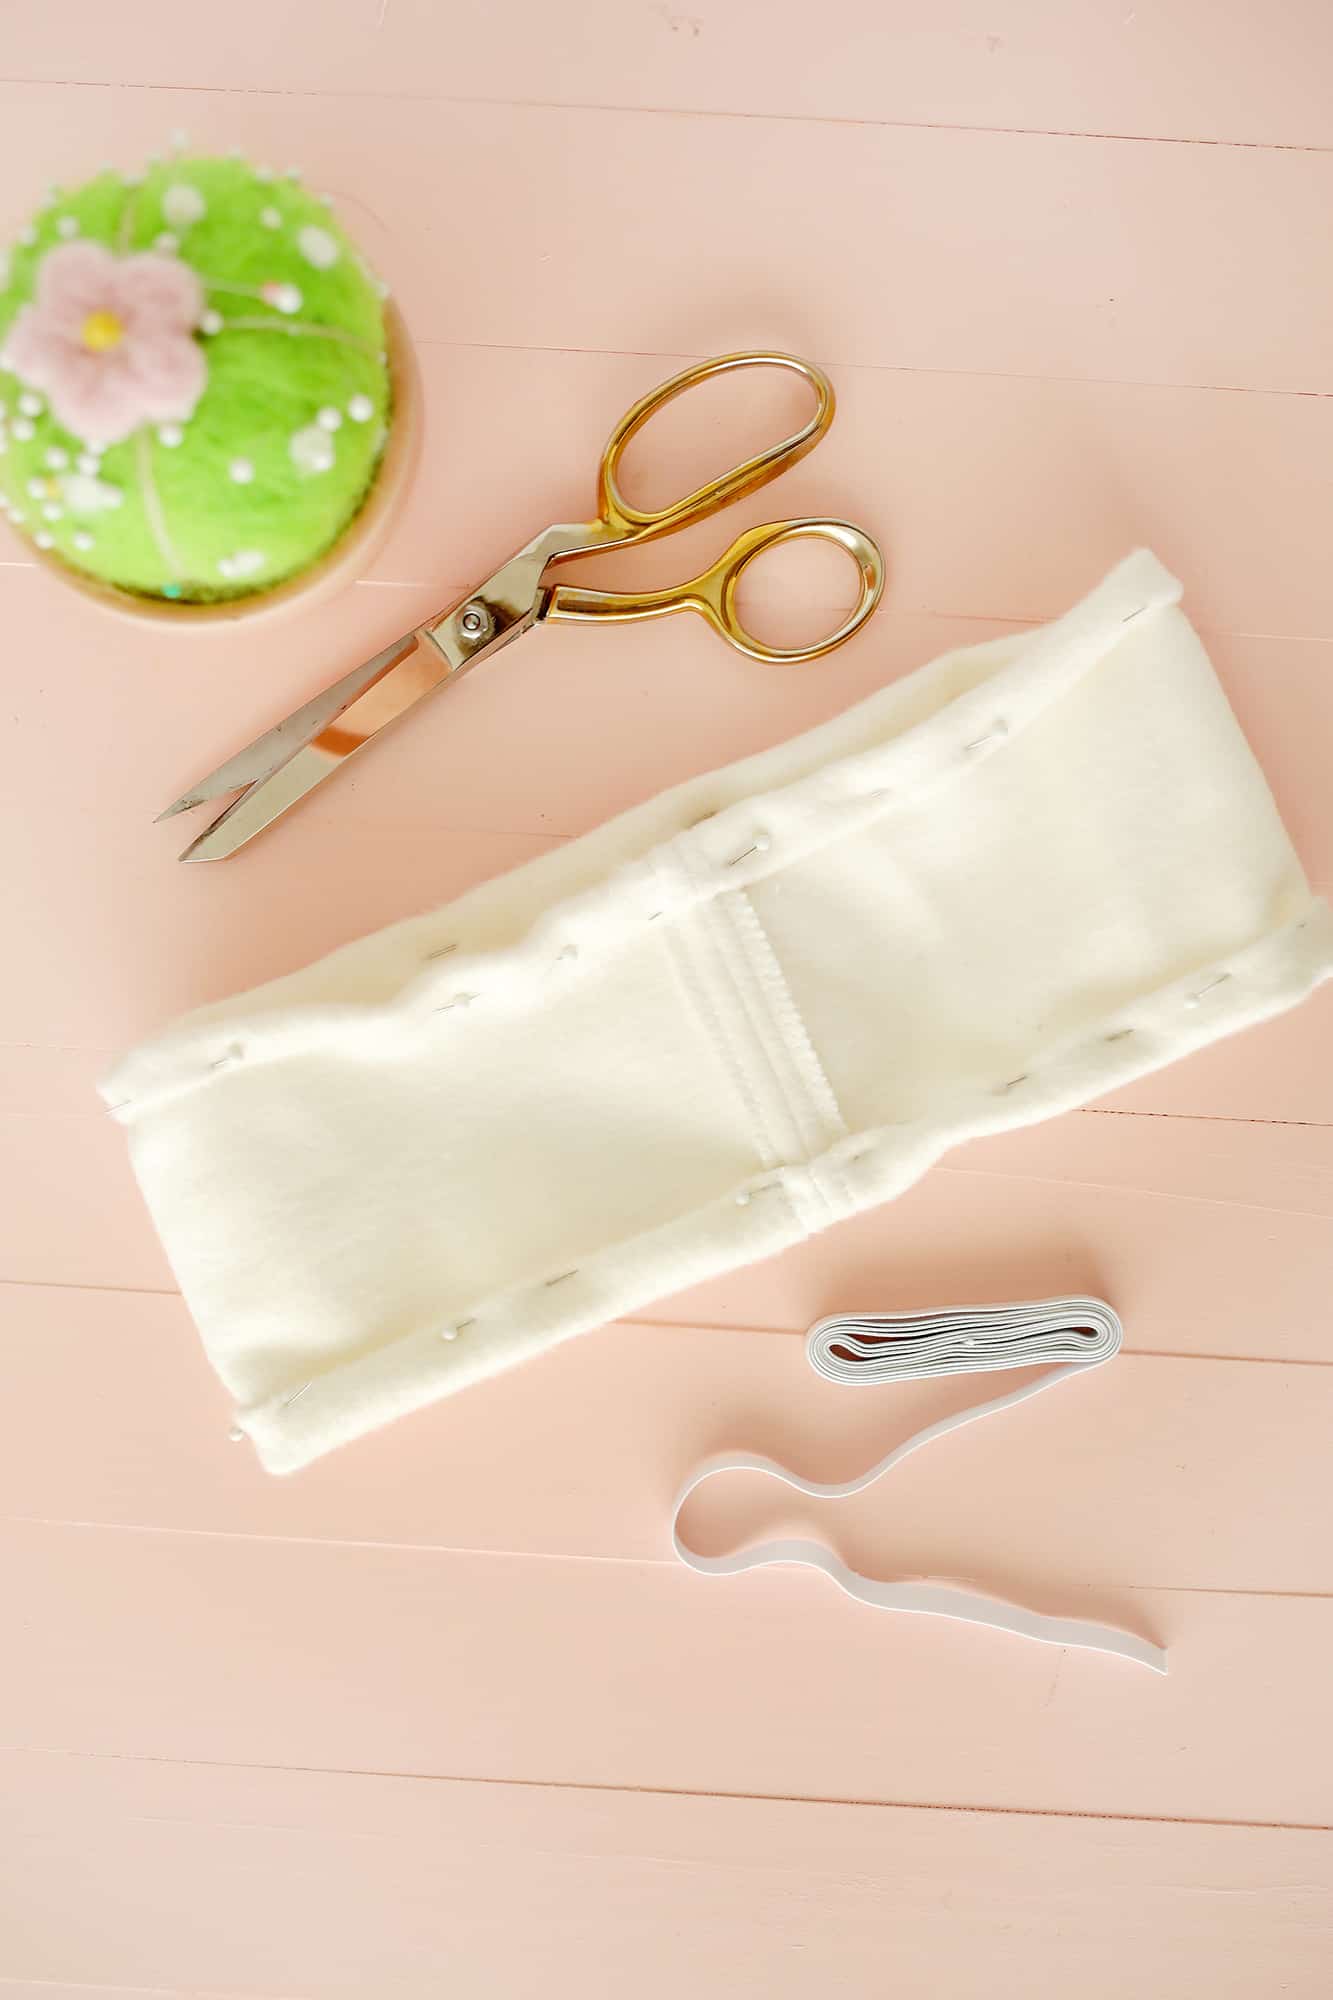
Thread your 1/2″ elastic all the way through the channel and back out, feeling and guiding the safety pin through with your fingers from the outside. Pin in place. Repeat with your second 1/2″ elastic.
You can try on your headband at this point and if it’s too loose cut off some of the elastic to make them both shorter and tighter (just make sure to trim your 1/4″ elastic to that same length).
 Once you have both elastics through, overlap and pin your elastic ends together and sew to join. Push them through back into the channels and then hand stitch the openings closed.
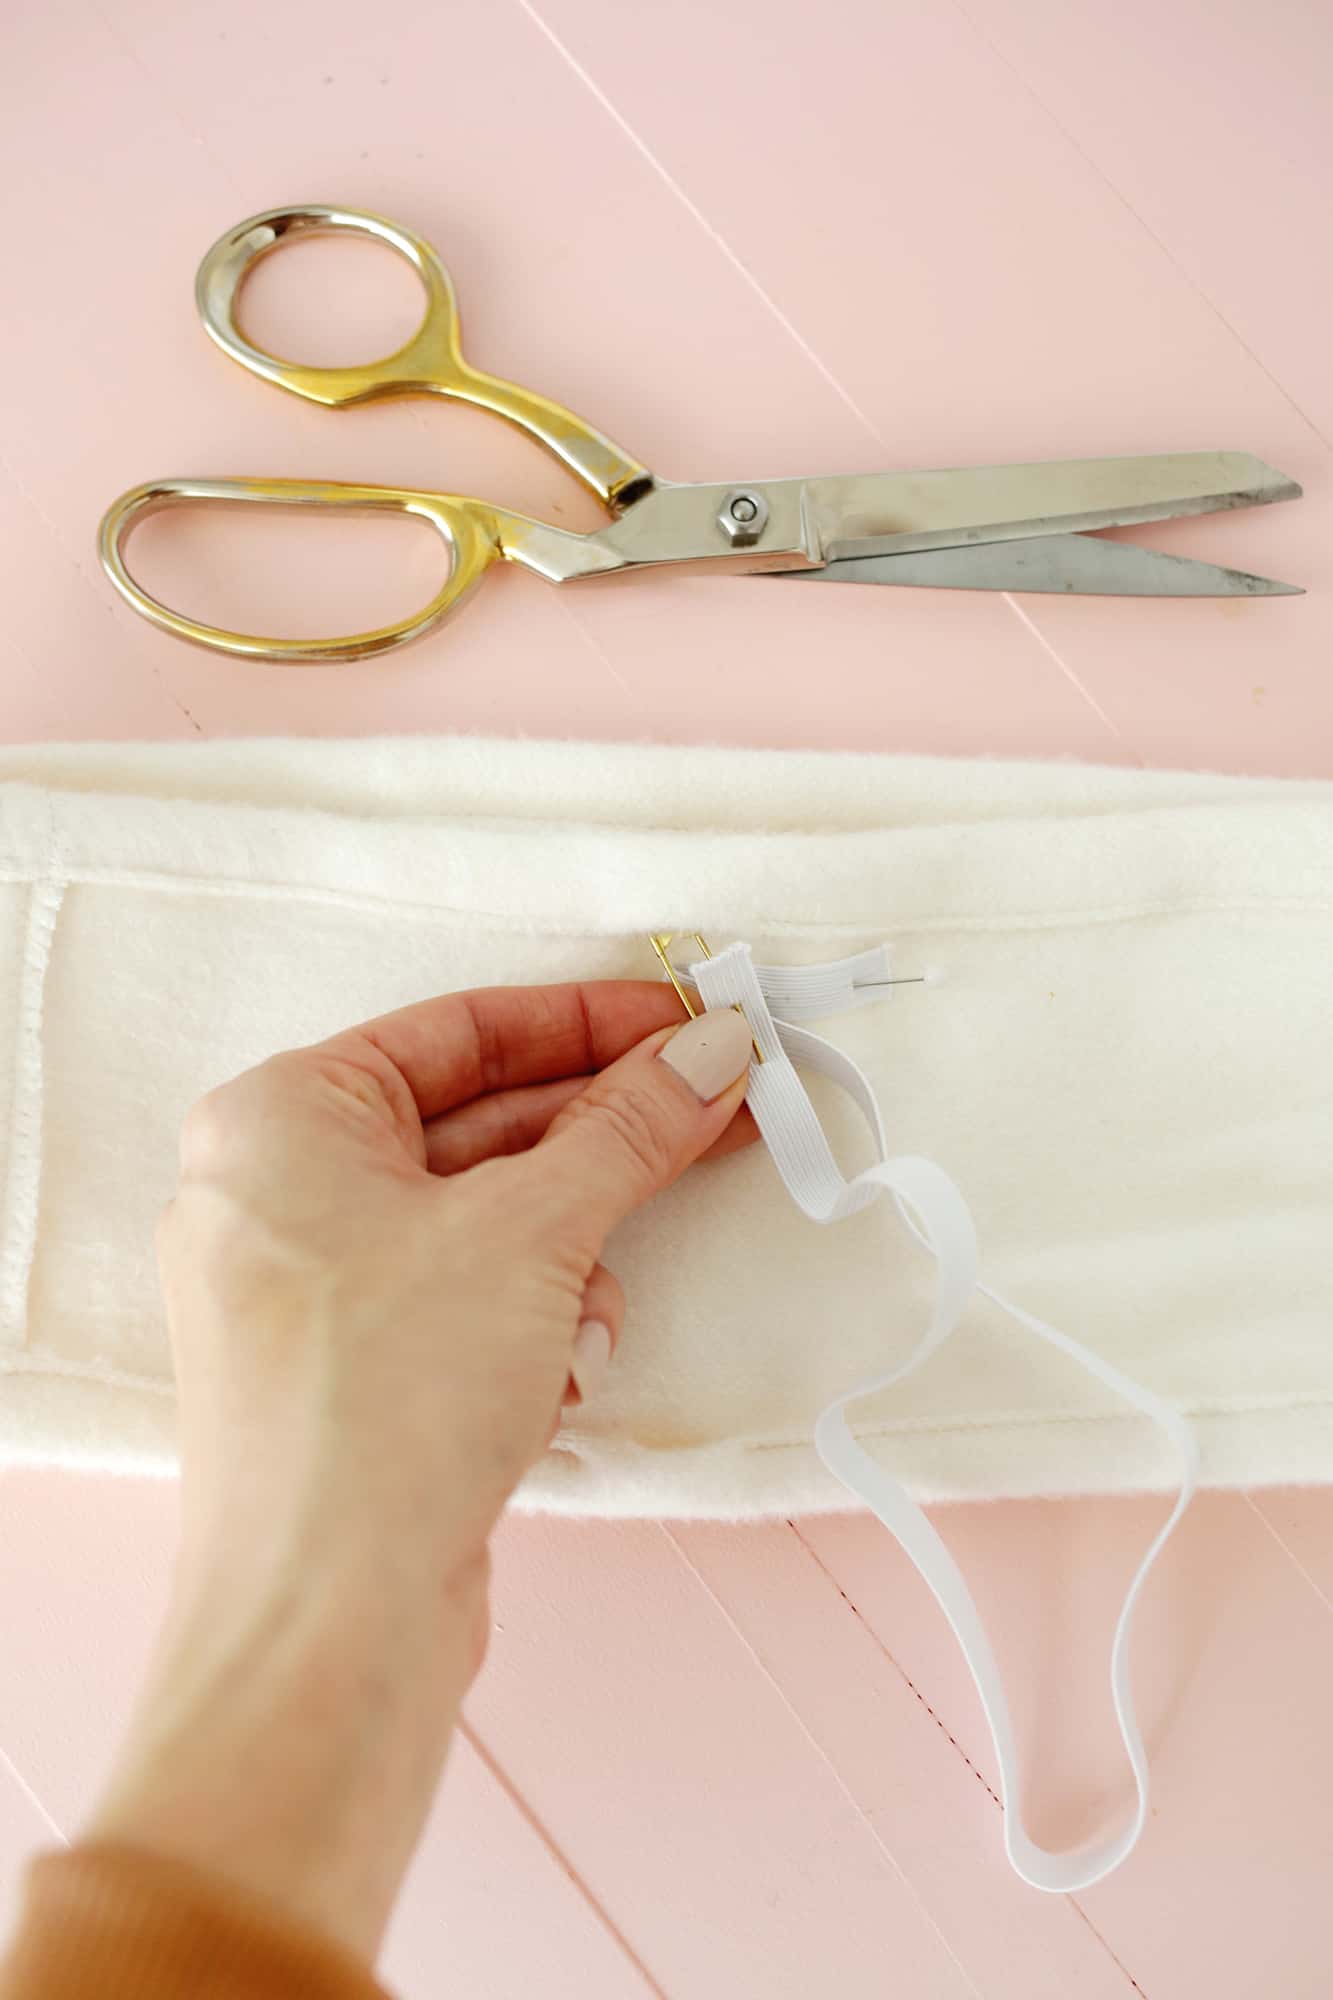
 You should now have a headband that fits but is kind of puffy if you turn it right side out and put it on. So we are going to add a little more elastic to the body part to make that look a little nicer. This step is optional, but I think it does look better.
I ended up adding two elastic bands instead of just one as you see in the photo (I think the two bands makes it look optimal), but one will definitely help if you want to do half the work—haha!
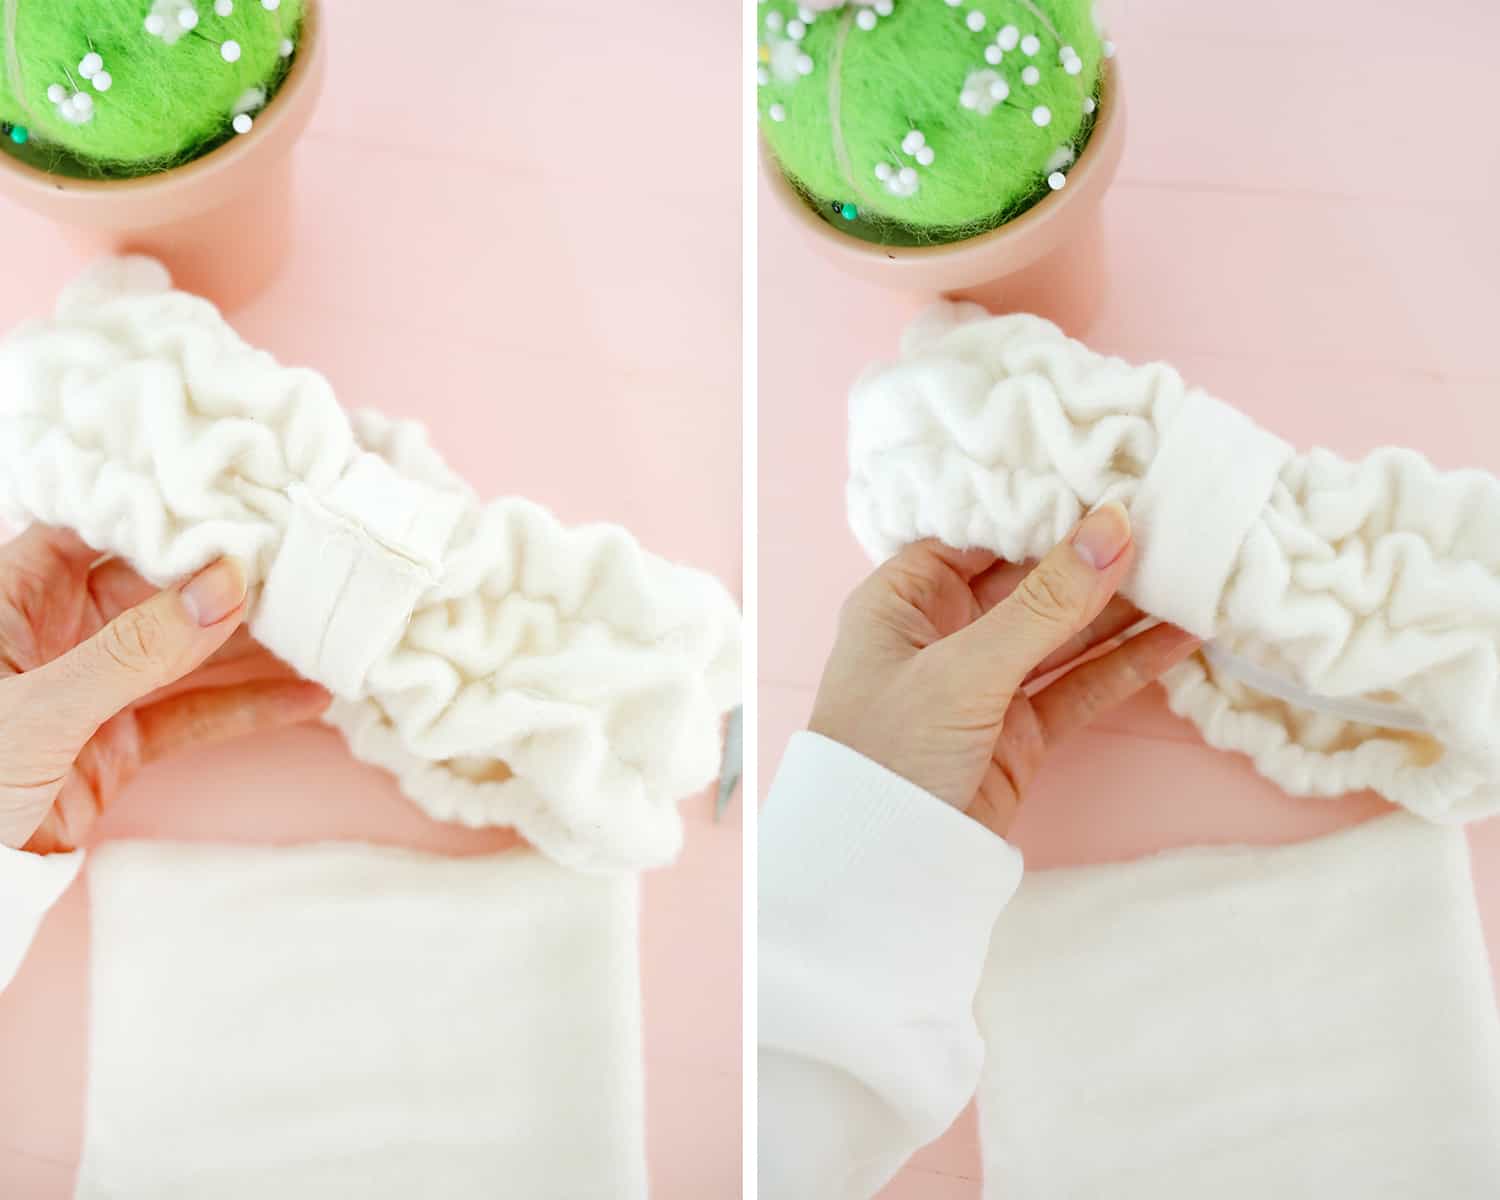
Take your elastic band, fold it in half and mark the middle point with a pen or marker. Pin the two elastic ends overlapping where your headband seam is (see photo above on the right), fold your headband at that seam to find its middle point on the opposite end of the headband and pin the middle of the headband to the marked middle of the elastic so the elastic is evenly spaced.
Fully stretch out your headband (you may need a second pair of hands for this or find a small box or pillow to stretch it around) and then pin the elastic to the headband every 2-3″. If you do one piece of elastic, do it right down the middle and if you do two then space them evenly in the middle section of the headband.

Sew down the middle of your elastic all the way around. To do this properly you need to pull it out so it’s stretched and flat with the headband as you sew (keep one hand pulling away from you behind the needle and the other in front of the needle pulling forward towards you a little).

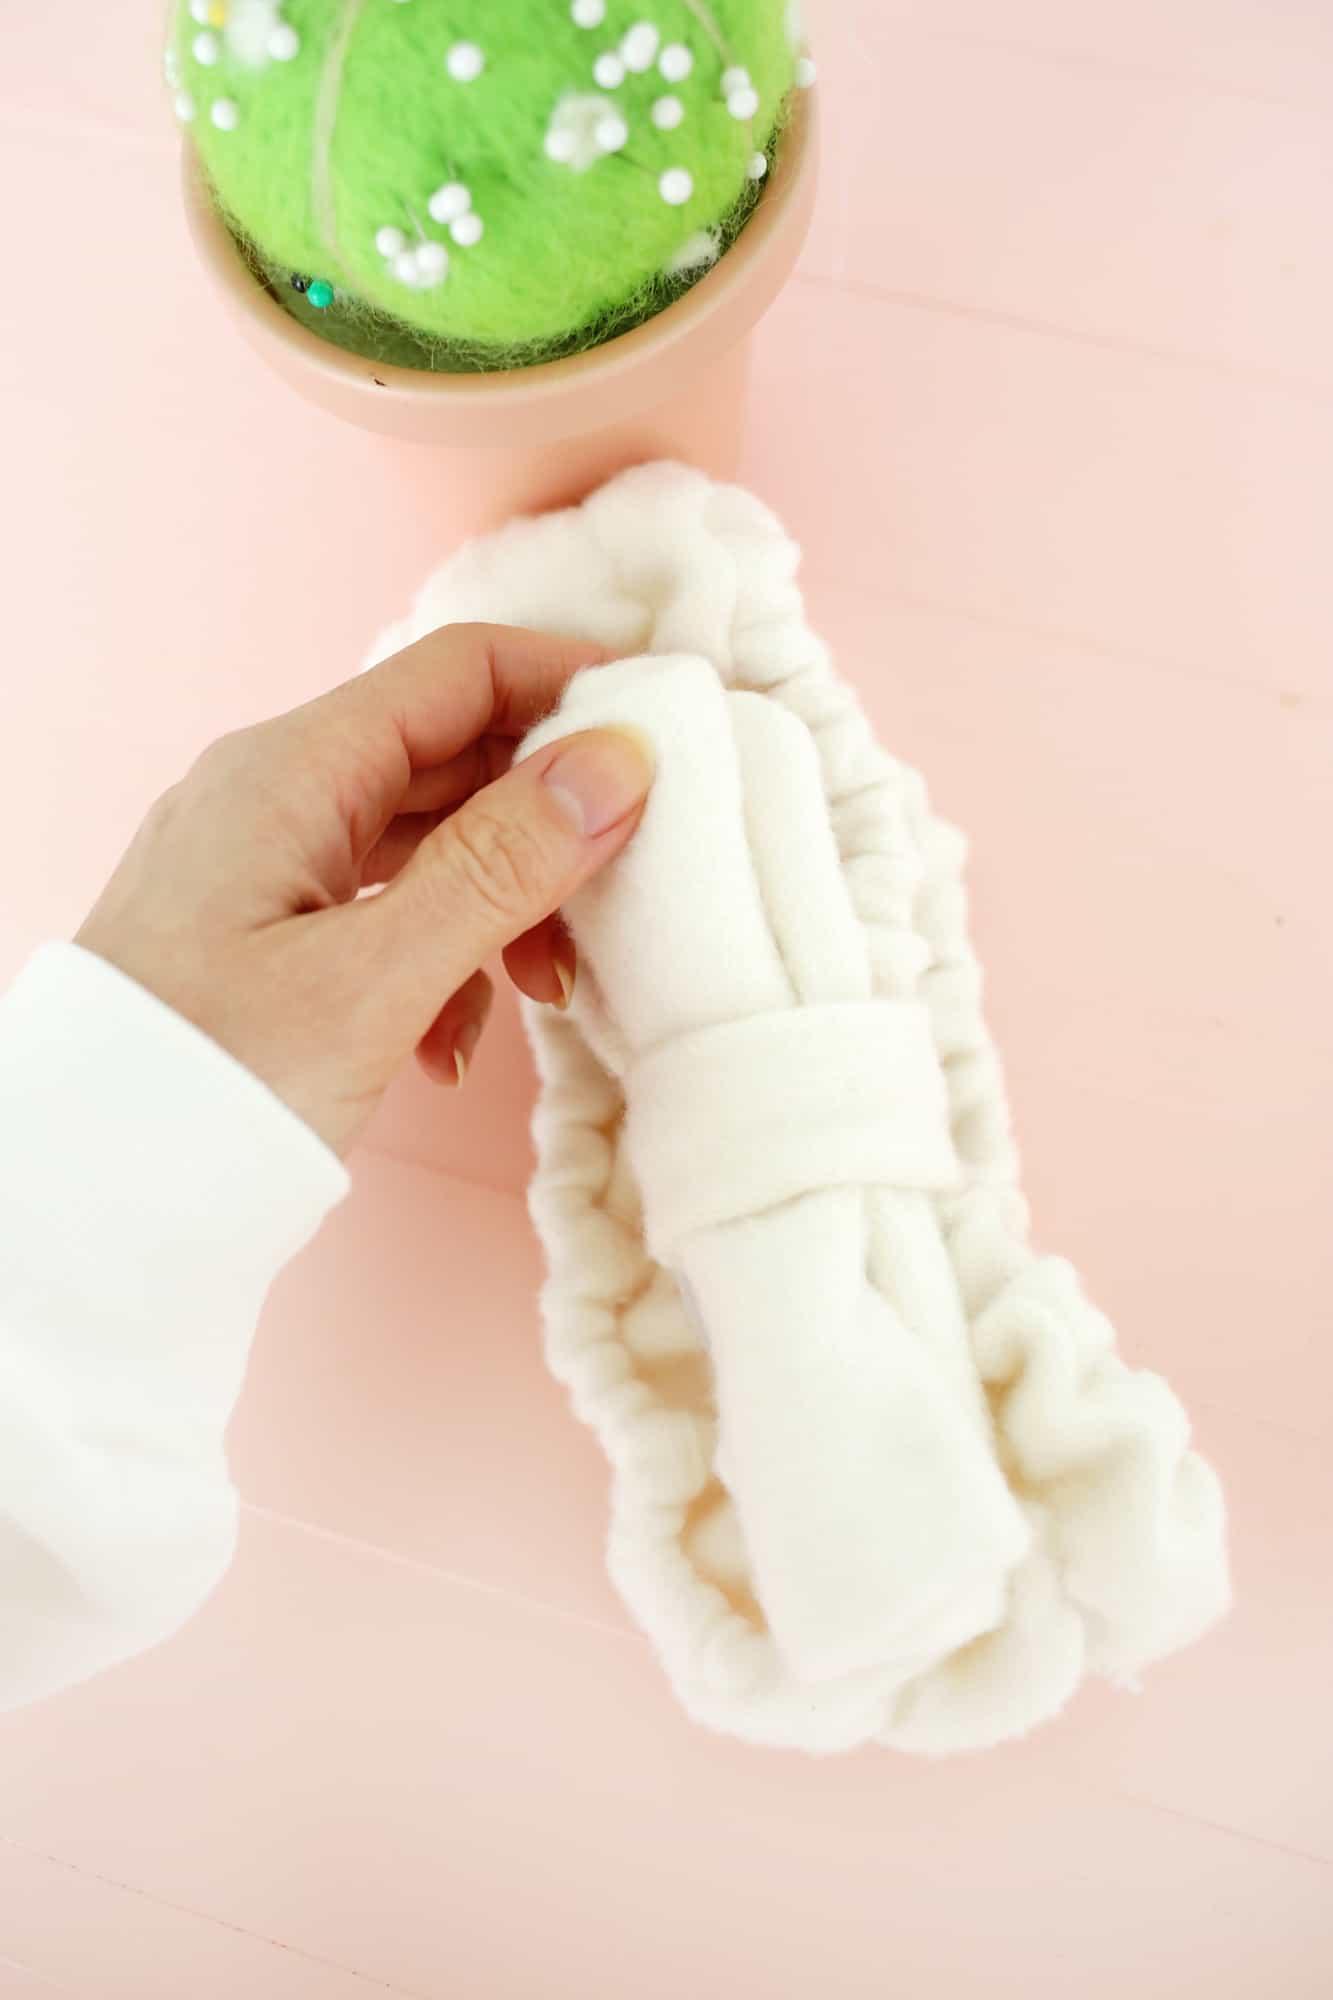
See? The elastic helps to hold the middle section close to your head too so it’s nice and tidy rather than puffy. Turn your headband right side out.
 Cut two 7″ x 5.5″ rectangles to be the bow of your headband and cut a rectangle 3.5″ x 5.5″ to be the middle section of the bow. Pin the two larger rectangles together and sew around the outside with a 1/2″ seam allowance leaving a 1-2″ gap for turning.
Fold your smaller rectangle in half, longways, and sew down the length with a 1/2″ seam allowance making a tube with both ends open. Zig-zag stitch around your sewn edges to keep them from fraying and turn both your pieces right side out. Hand-sew your bow rectangle opening closed.
 With the seam facing outward, wrap your bow middle around your headband and sew the ends together with a 1/4″ seam allowance. Zig-zag stitch the seam allowance. Turn your bow middle so the seam side is on the inside.
 Roll your bow like a fruit roll-up and thread it through your bow middle.
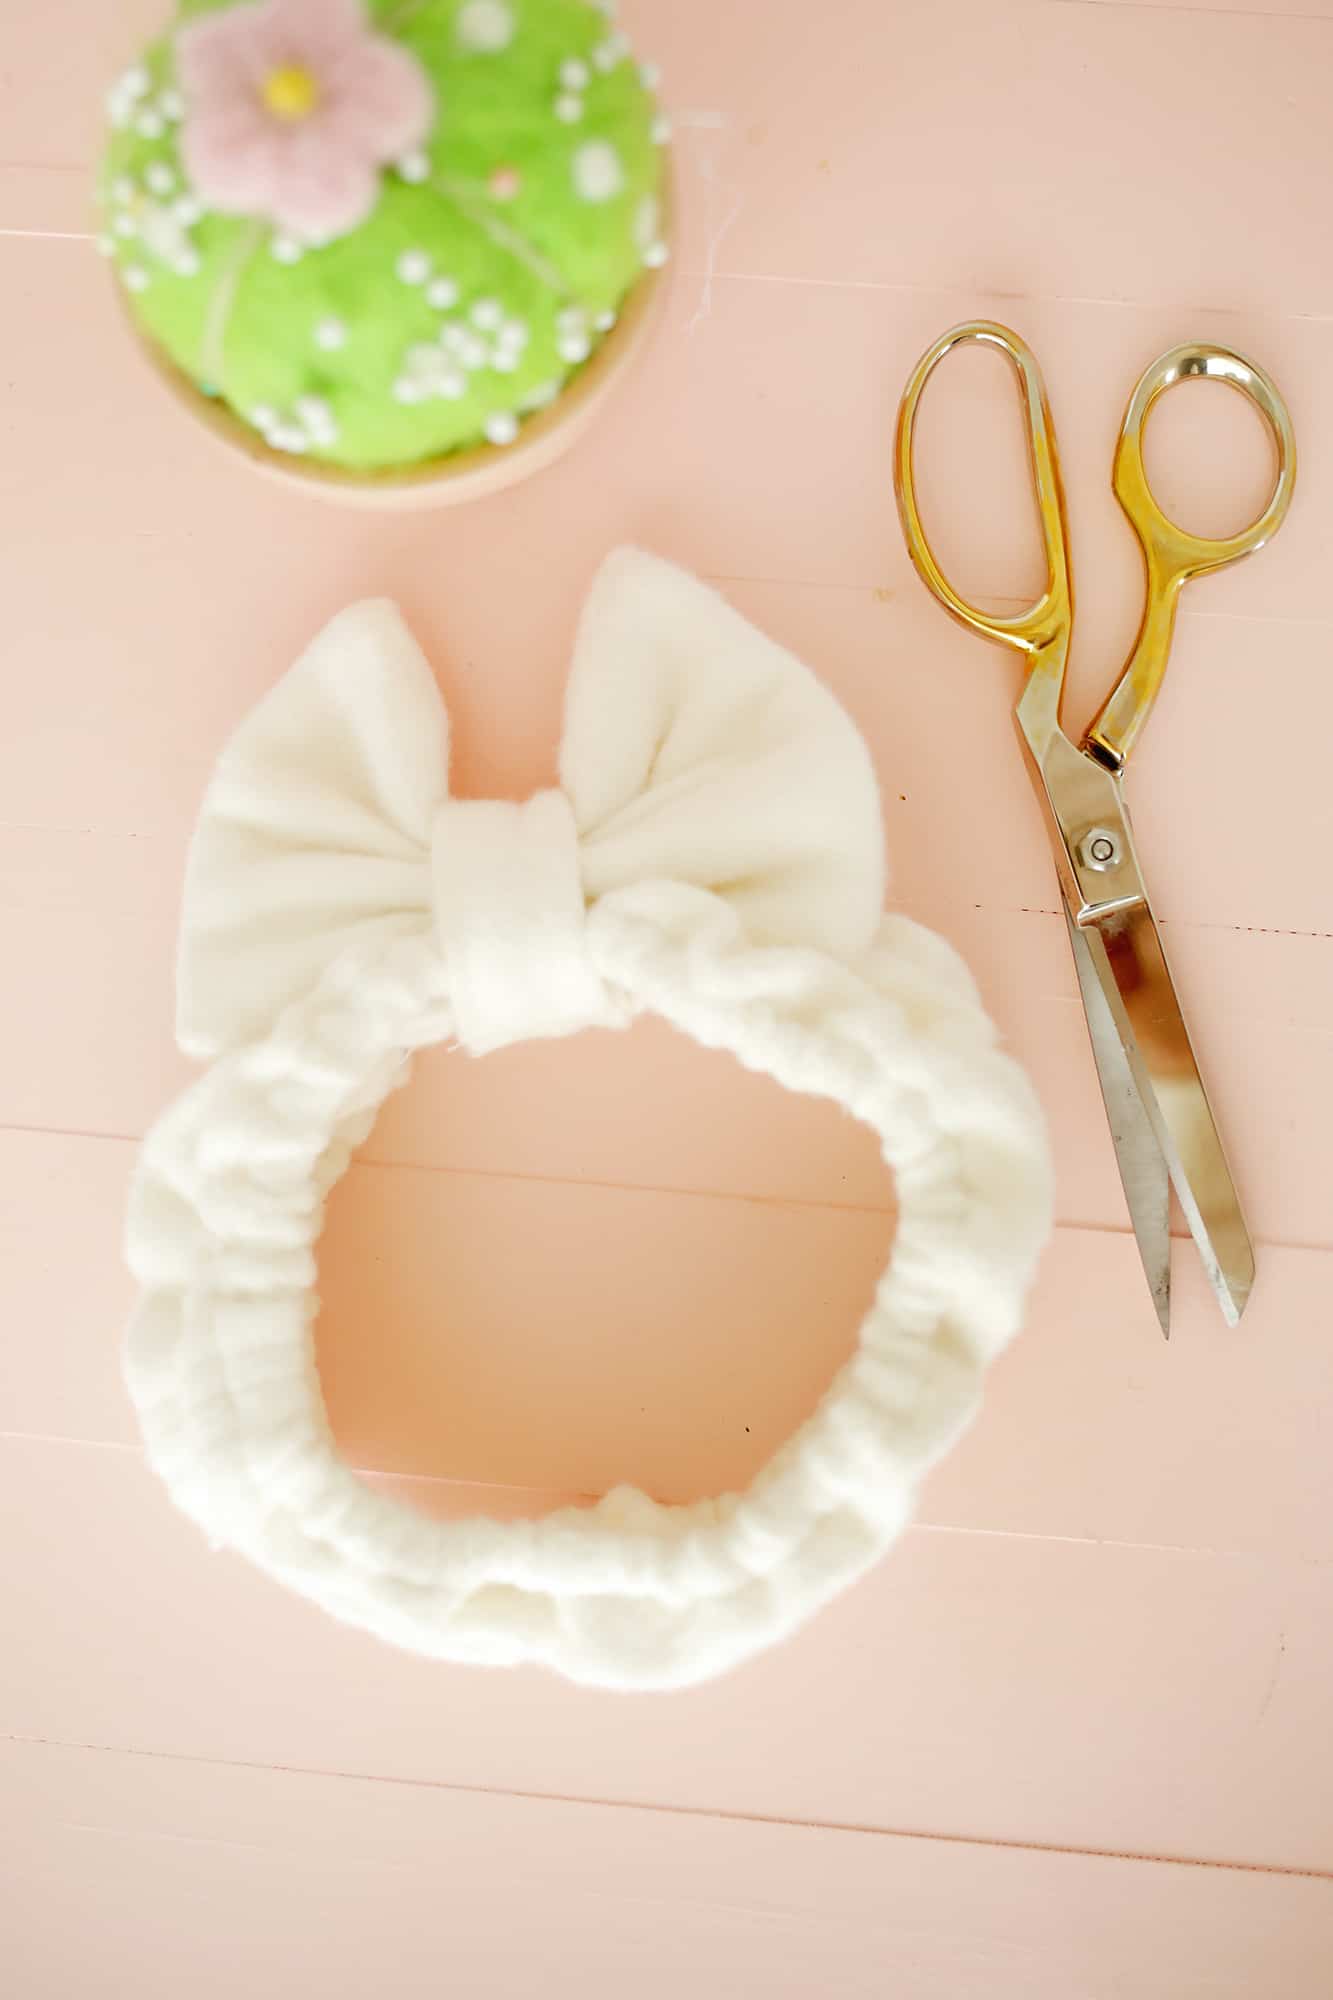
Unroll your bow, fluff it up, and your headband is ready to use!
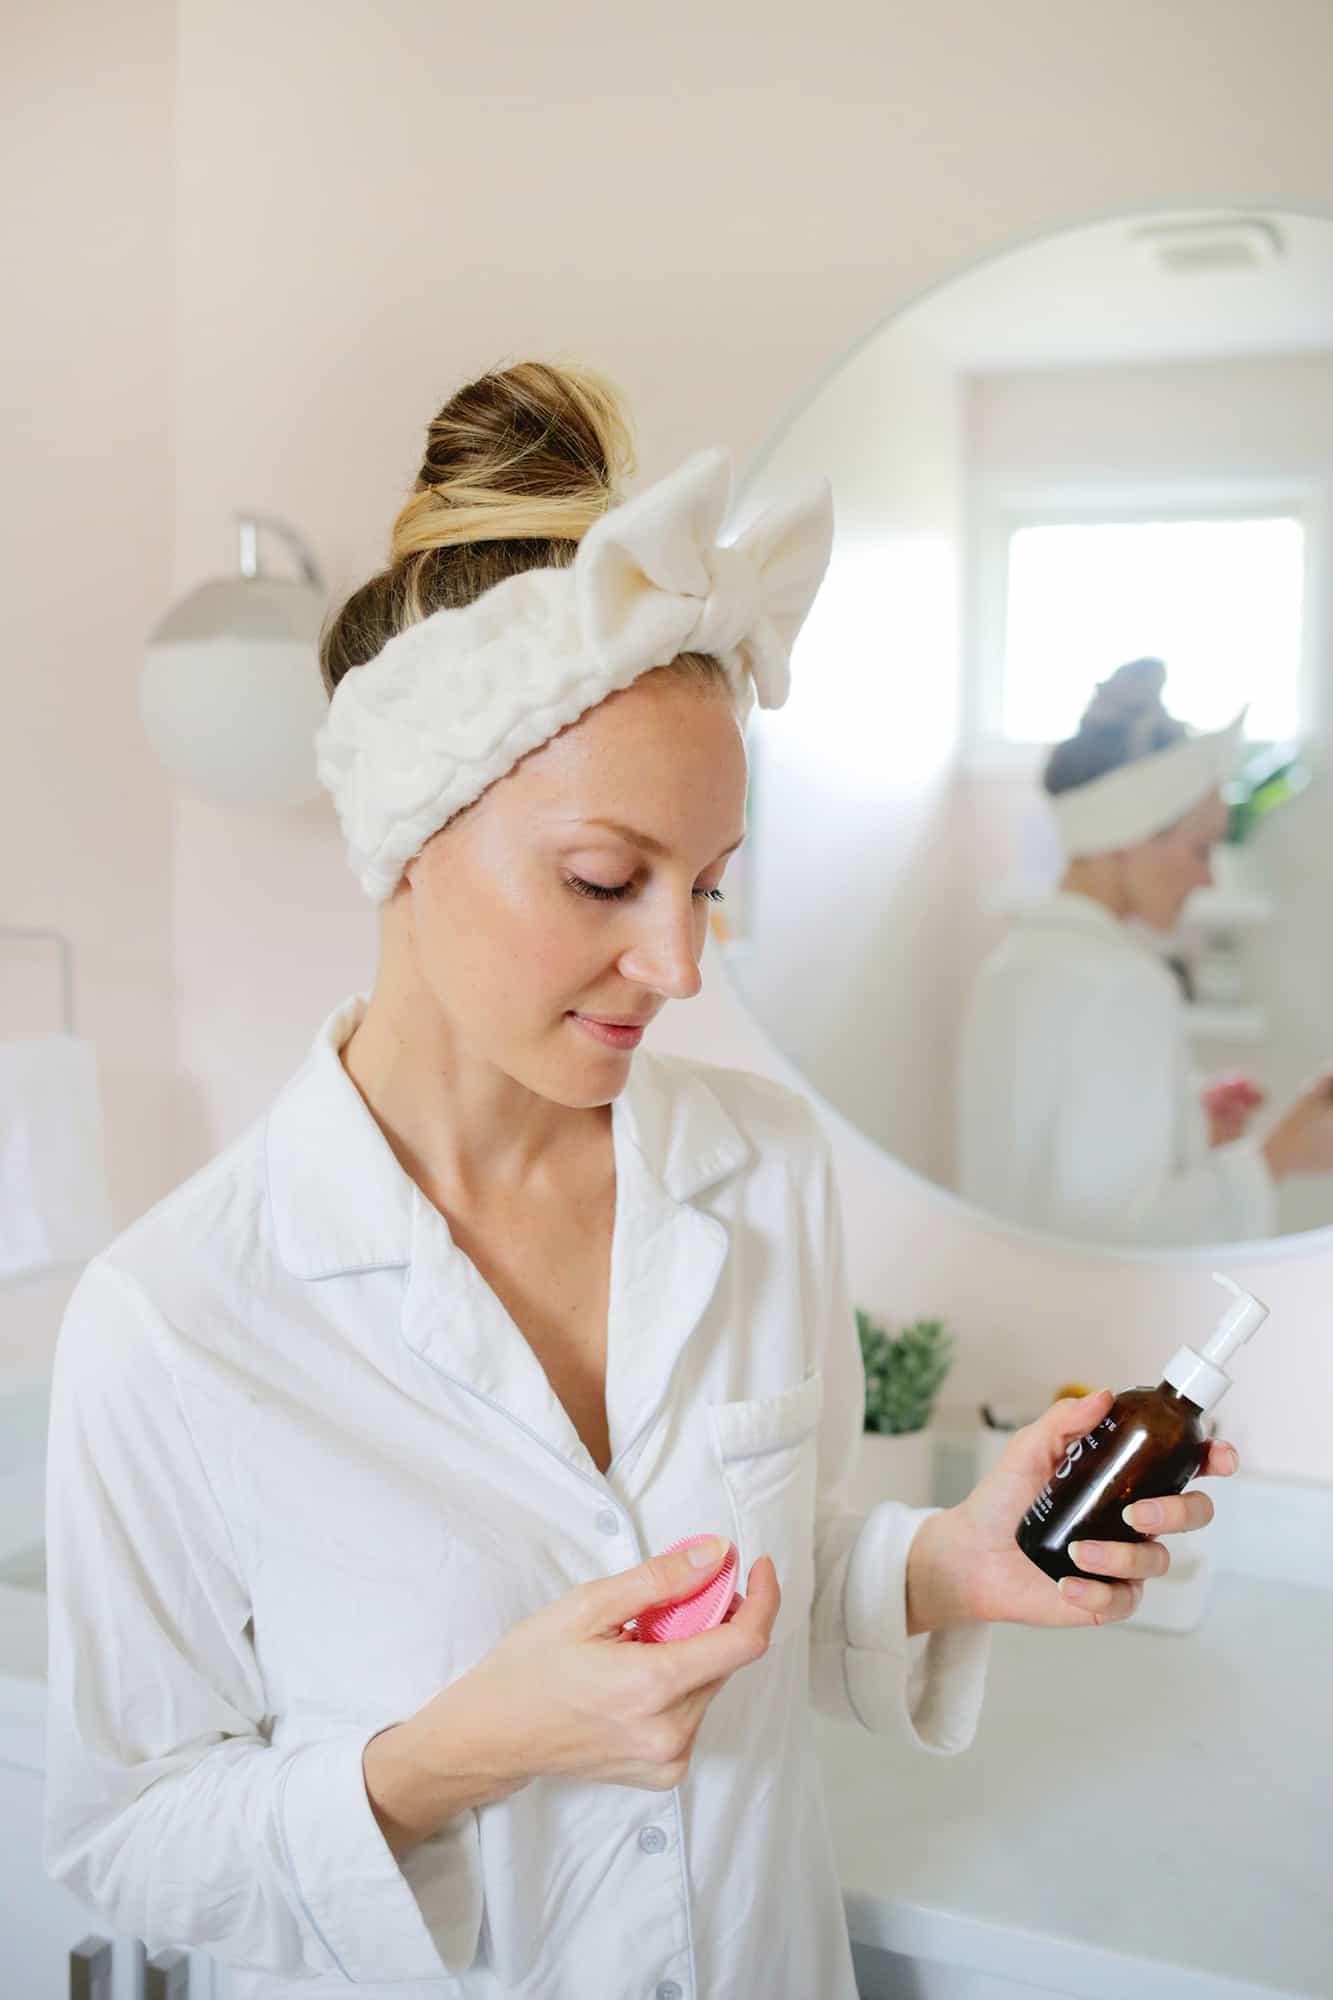

 I’ve got to say that I’m pretty proud of myself here … it looks so profesh! I love that it helps keep shorter pieces and flyaways out of my face while I wash my hair (or you can use it while applying makeup as well), and I can throw it in the wash as needed with my washcloths and reusable makeup wipes.
These are also great if you are doing a beauty mask and want to keep your hair at bay (although if you do a lot of charcoal and darker masks you may want to make a darker colored one to hide any mask stains).
Overall, you just can’t help but feel cute and pampered when you pop one of these on—love it! xo. Laura

Made six of these for my bridesmaids from scrap material from making their PJs! Once I got the hang of it, totally straightforward. Thanks so much 🙂
Thanks so much for this tutorial!
I was wondering if I have to serge or zigzag the edges.