
 One of my personal goals this year is to experiment with more utilitarian woven projects that are both beautiful and functional. If you’ve got more wall hangings than you have wall space, you can understand the need to expand your weaving repertoire.
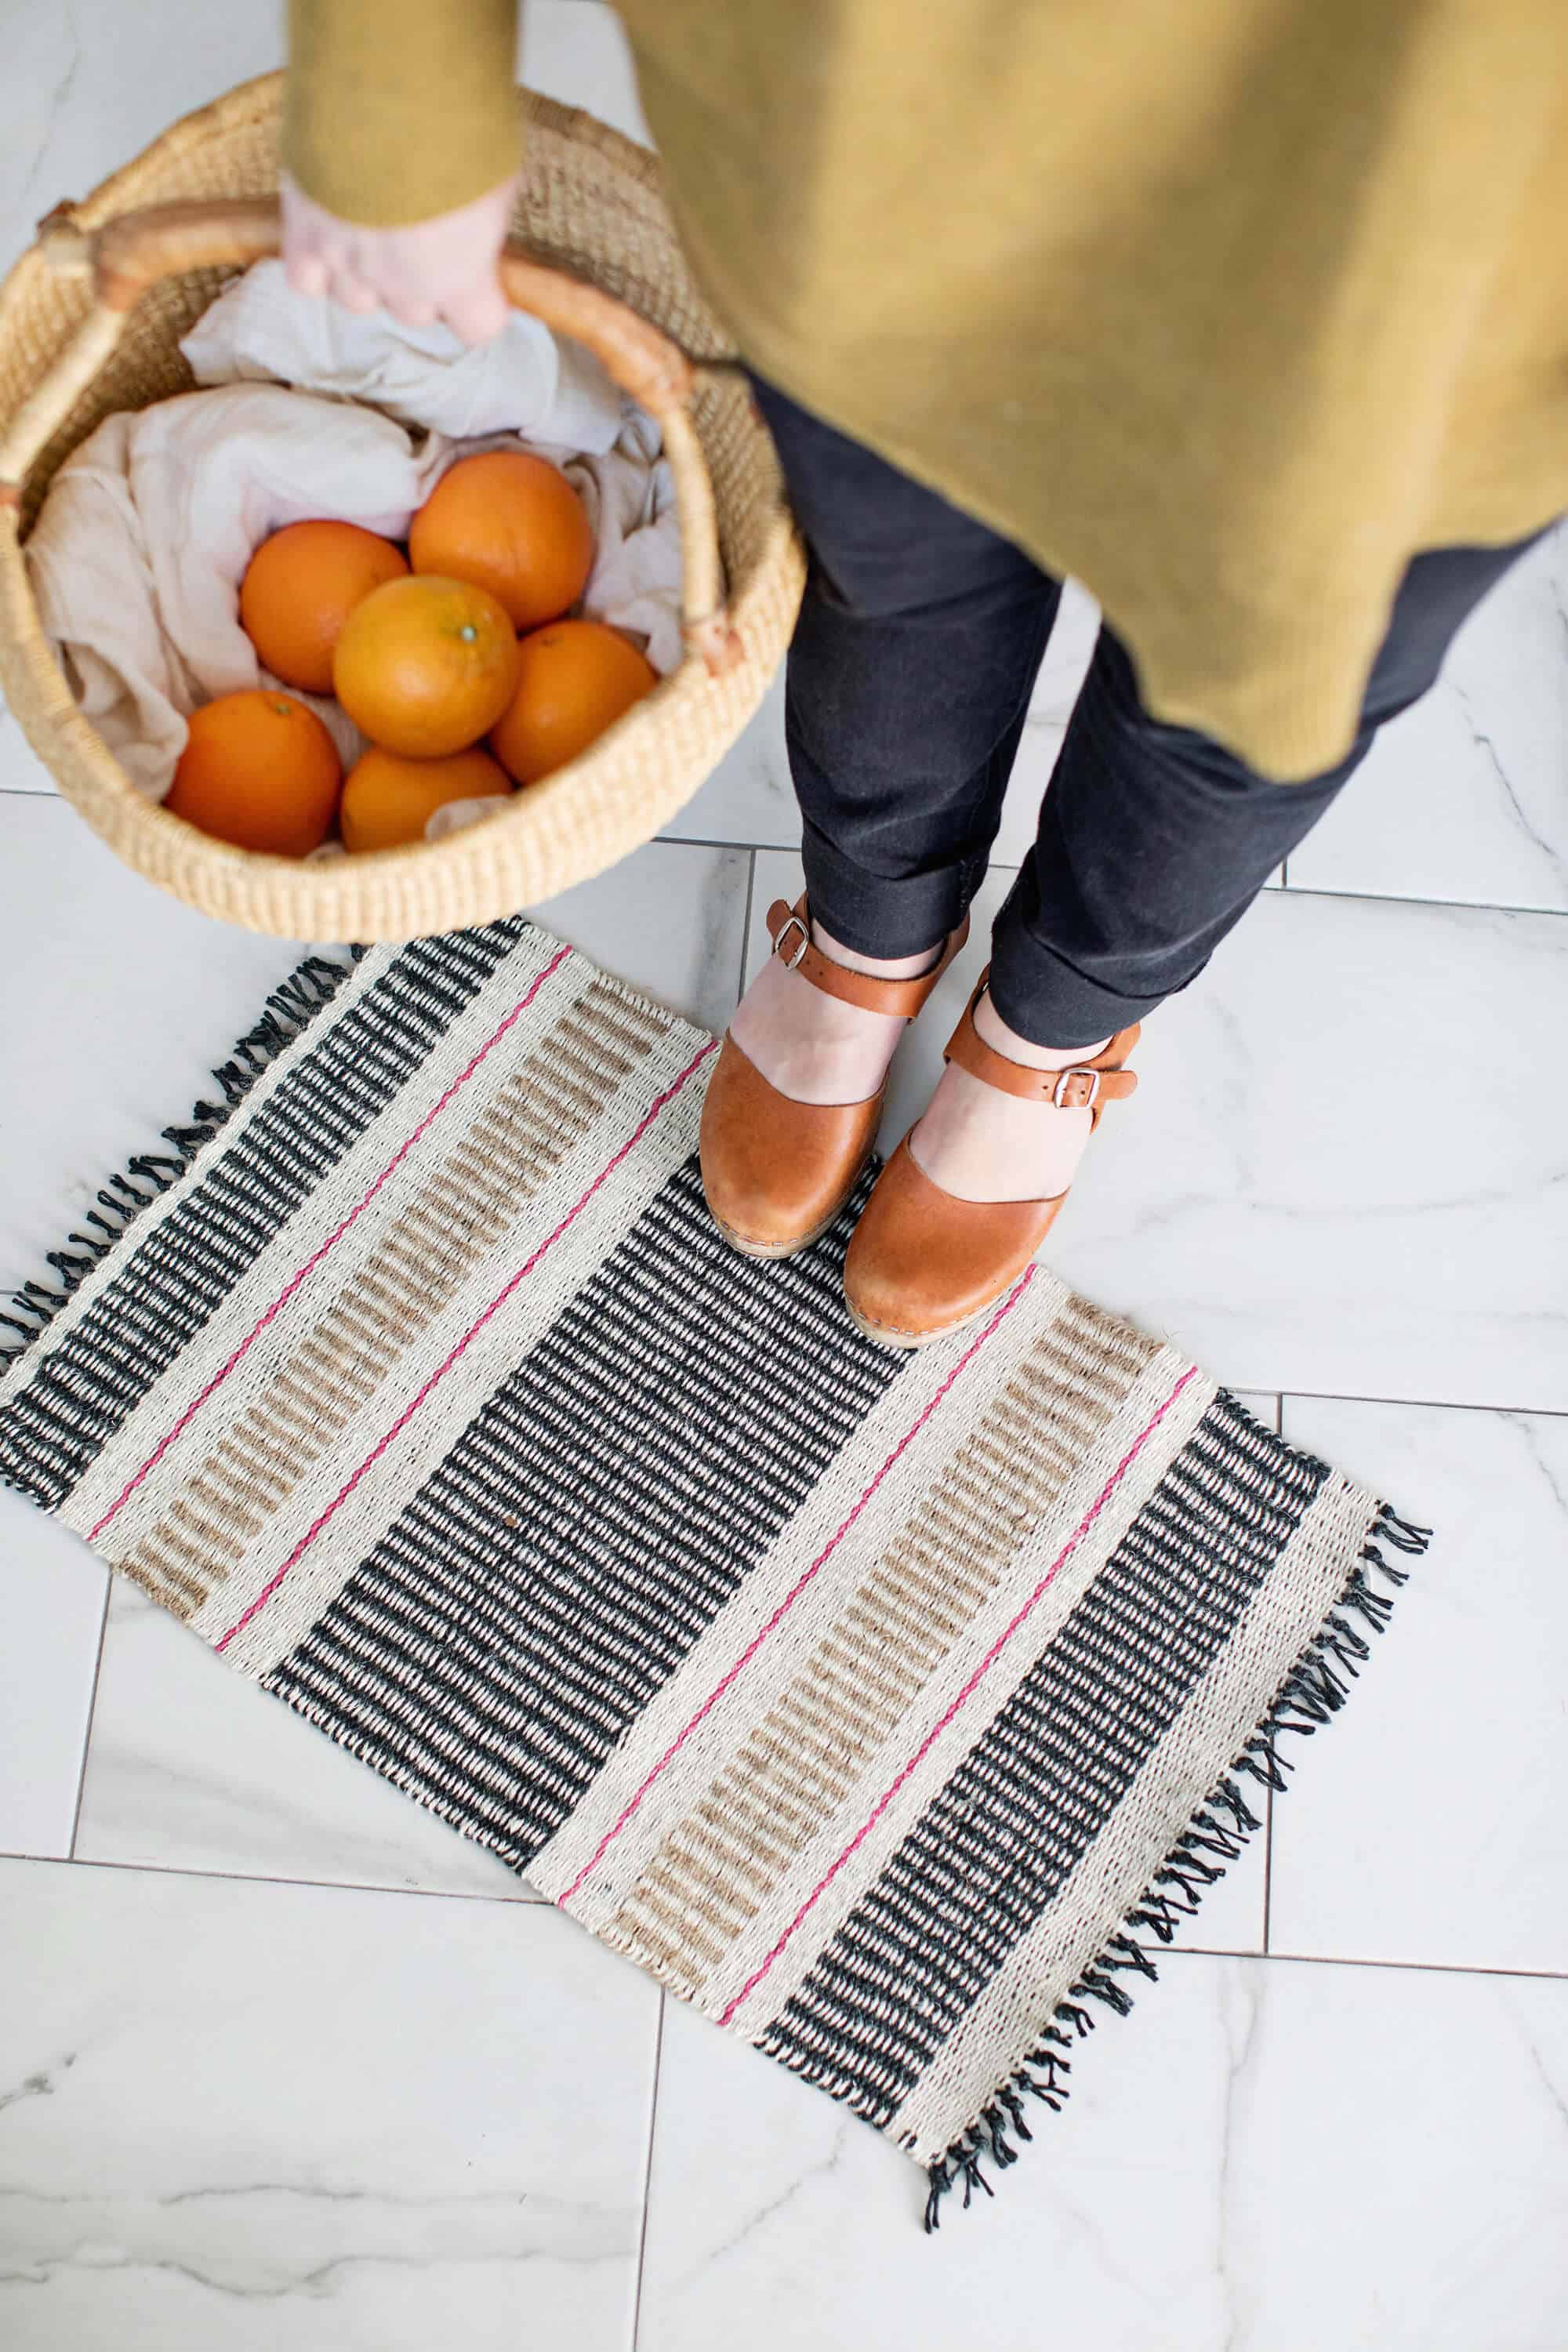
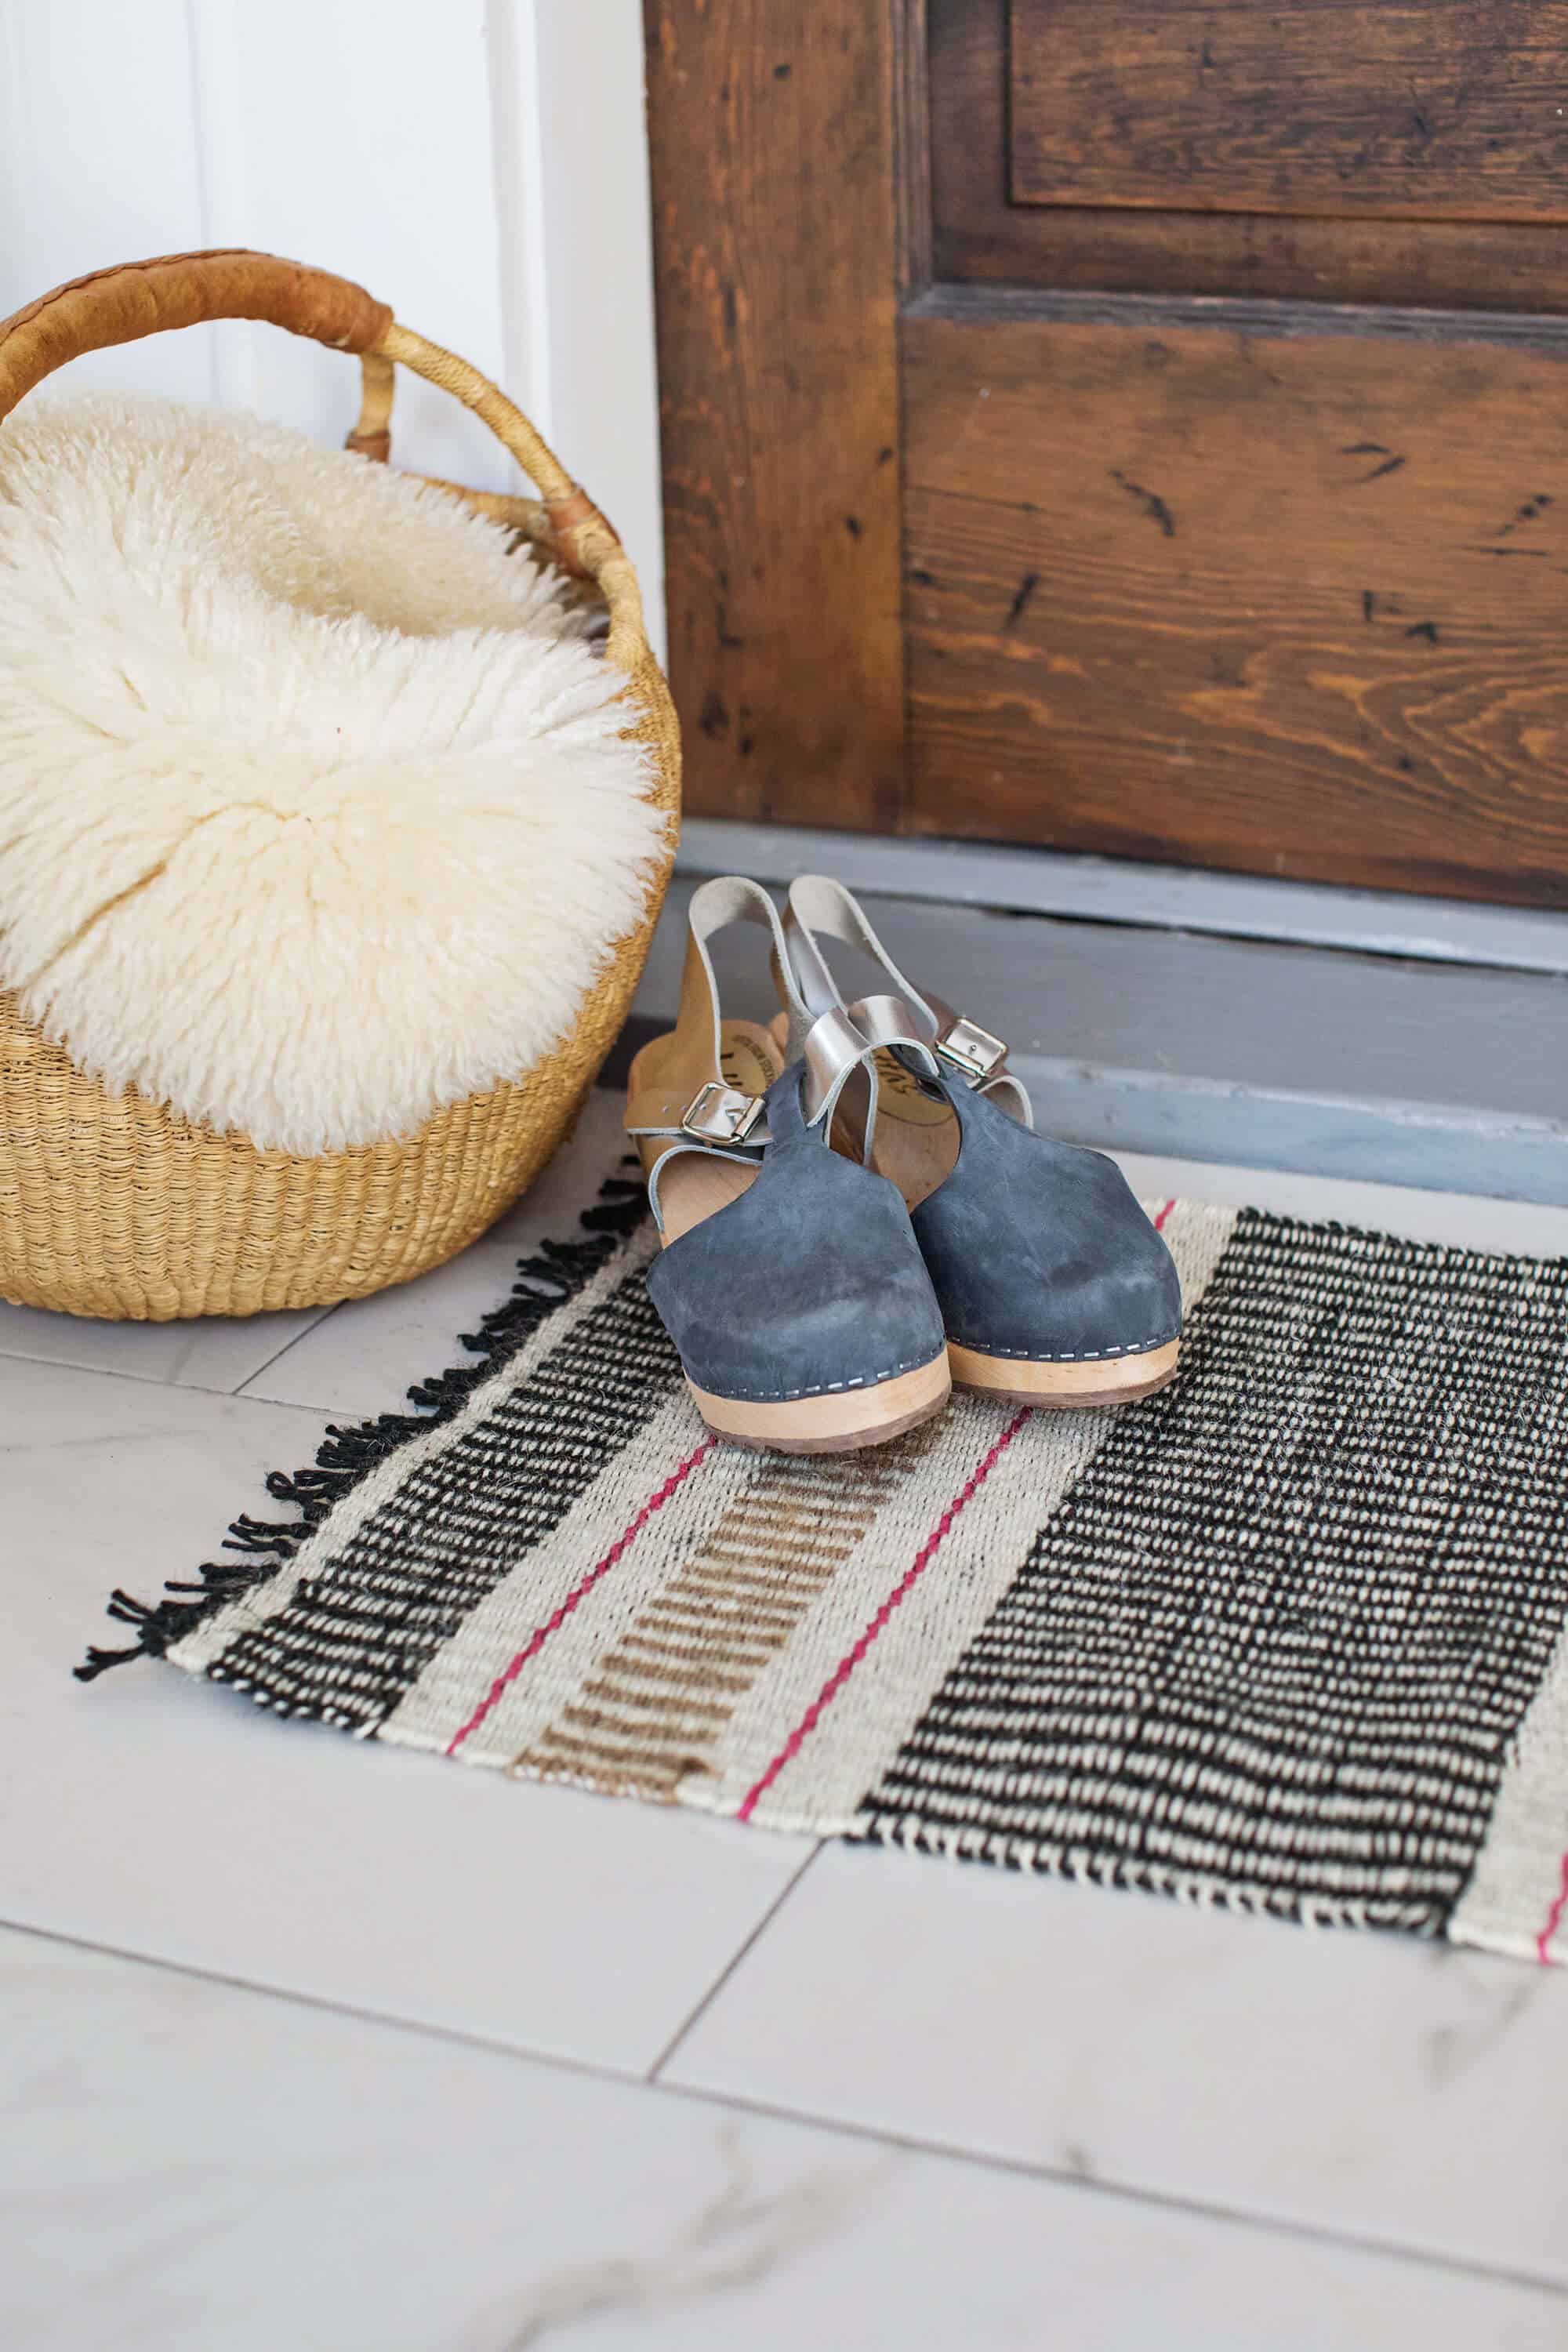
Last week, I showed you how to weave your own scarf and this week, I’m sharing how you can make a beautiful mat out of jute fibers. I love mine so much that I actually don’t want anyone to stand on it!
Start here: Weaving for Beginners
I also wanted to explore a traditional weaving technique called pick and pick. You’ve probably seen it used in handwoven baskets from Ghana, like this one. It allows for vertical stripe patterns and dashes, among others, that can add much more interest to a flat design that plain weave alone.
This type of project is great for those who have some weaving experience under their belt already, but if you’re a rookie and feeling brave, I won’t talk you out of it!
R

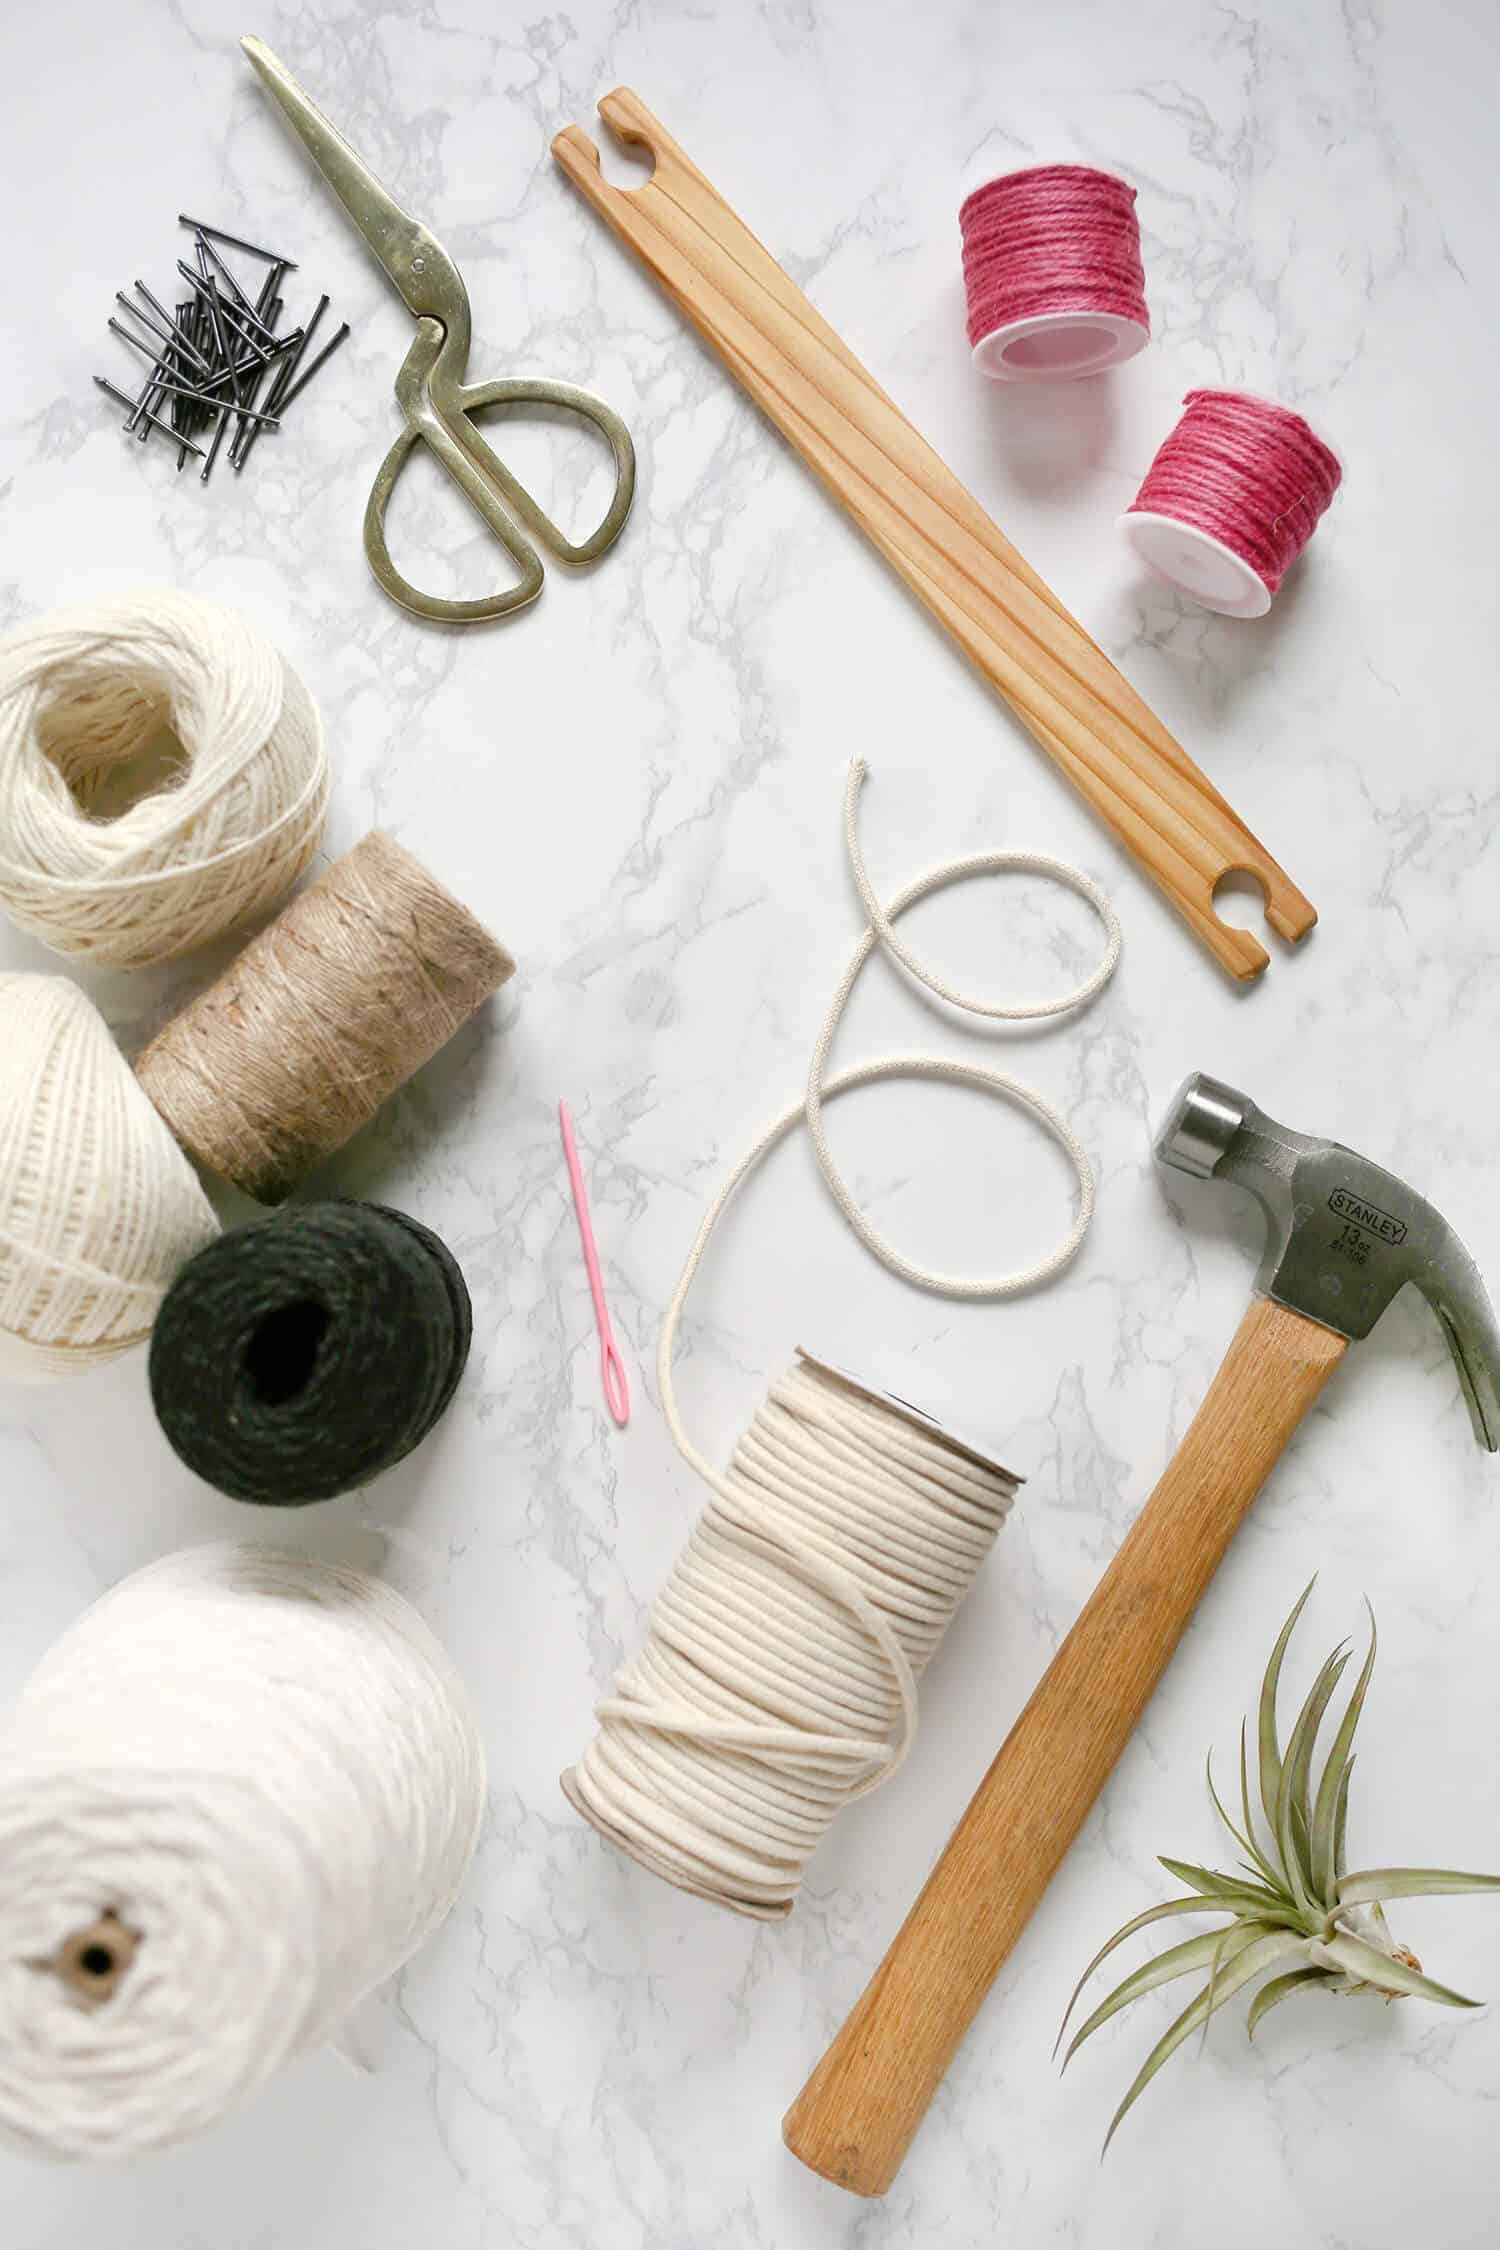 Supplies:
–two 100m rolls of 2mm cream jute
–three 100m rolls of 2mm black jute
–one 100m roll of 2mm natural jute
–one 10m roll of 2mm pink jute
-paint stick or yardstick
–3″ tapestry needle
-fork, weaving comb, or beard comb
–two 12″ stick shuttles
To make your loom:
-pine or MDF measuring about 24″ x 32″ or greater
–seventy 1.5″ finishing nails
-hammer
-yardstick
-pencil or chalk
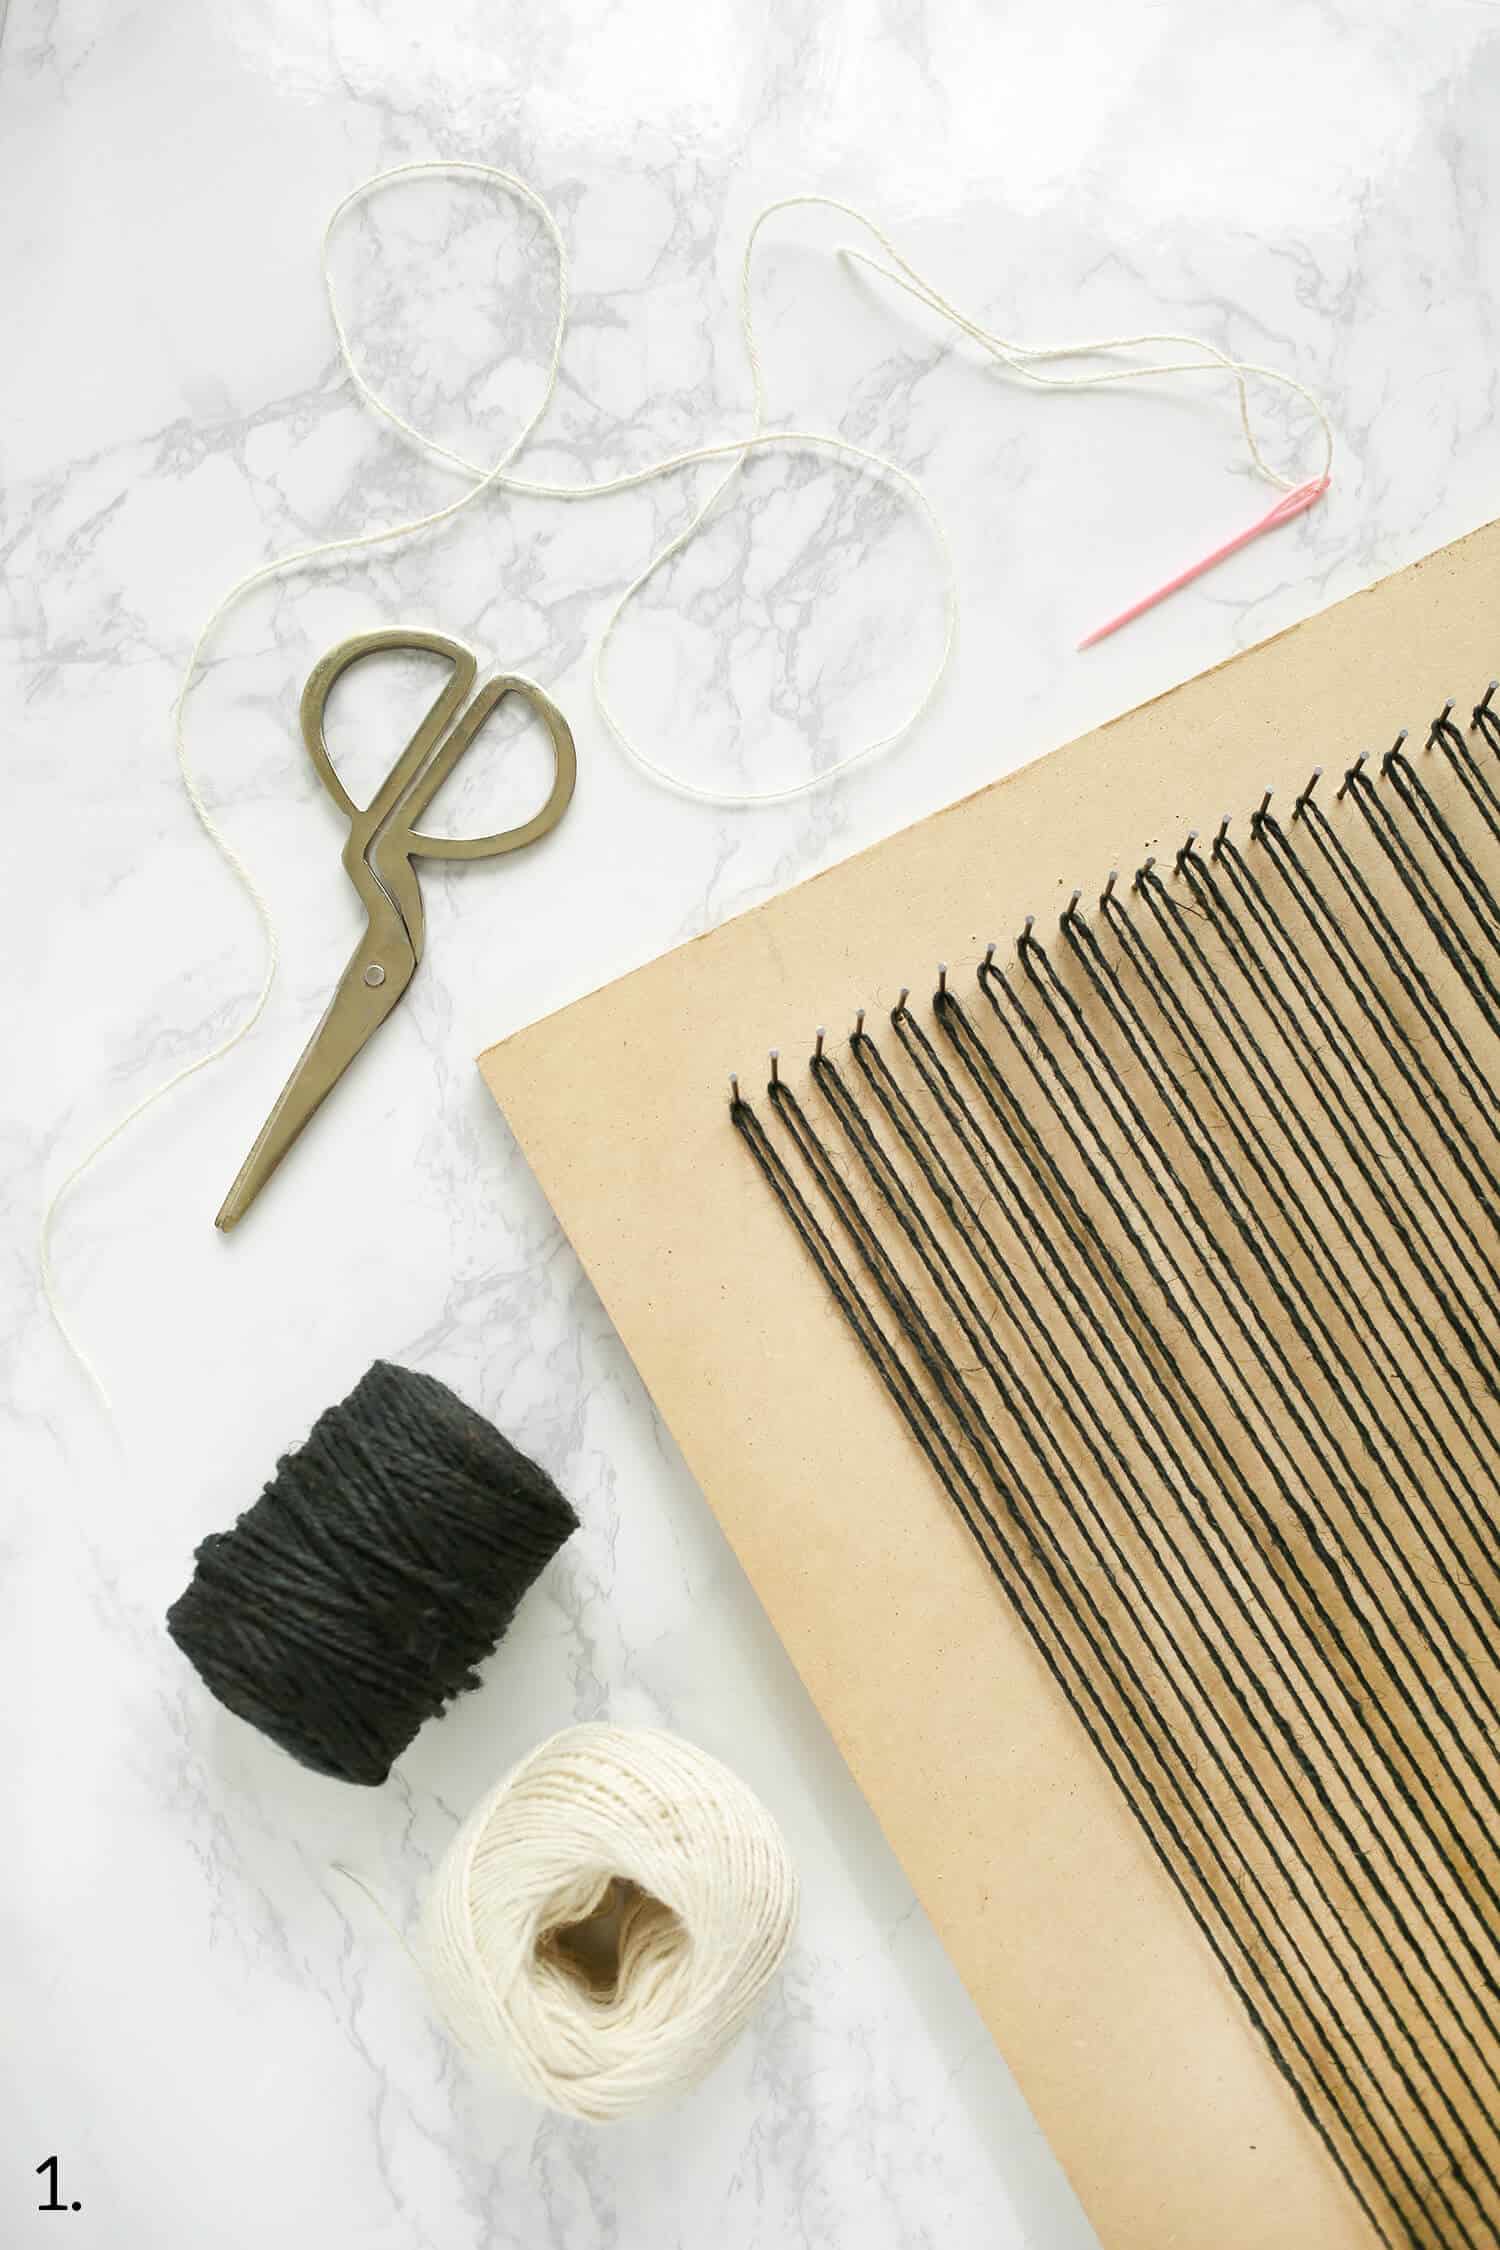 Step One: Build your loom by nailing 33 finishing nails about 2″ below the top edge of your board so that they are about 1/3″ apart. Measure 30″ below your top row of nails and add another row of nails, this time with 34 nails.
Warp your loom using black jute yarn. Start with your loop knot on the left edge of the bottom row of nails and warp all the way across so that you end on the bottom right edge with another loop knot.
For more detailed photos on how to warp your loom, you can reference this weaving tutorial.
 Step Two: Cut a 4′ length of cream jute and thread one end through your needle until you have an 8″ tail. This will make up your first few weft rows.
Starting on the left hand side, weave your needle through the loop knot so that you start under the first side of the knot and over the second side of the knot. Then continue weaving your needle under and over, under and over.
Step Three: Make sure you finish on the last knot so that you go under the first side of the knot and over the second side. Weaving through these knots ensures your rug doesn’t unravel down the road.
As you weave your weft row all the way across, allow for a little slack by creating a slight arch with your cream jute. Next, gently press the center down so that it is resting on top of the row of nails. Then use your fingers, a fork, or a comb to press the rest of your weft row flat.
 Step Four: When weaving back in the opposite direction, make sure you weave the opposite of the weft row below. On my first weft row, I ended over the outer warp row (of the loop knot) as shown, so I started my second weft row weaving under the outer warp row and over the next one.
Step Five: Keep weaving back and forth until you run out of jute. Instead of leaving your tail ends on the end of the row, I suggest starting a new row. This allows for clean edges and less work at the end.
Instead of tucking your tail ends behind your warp rows like you would for a wall hanging, leave your tail ends poking up. The pattern we’ll be weaving will be the same on both sides, so this is the easiest way to save time.
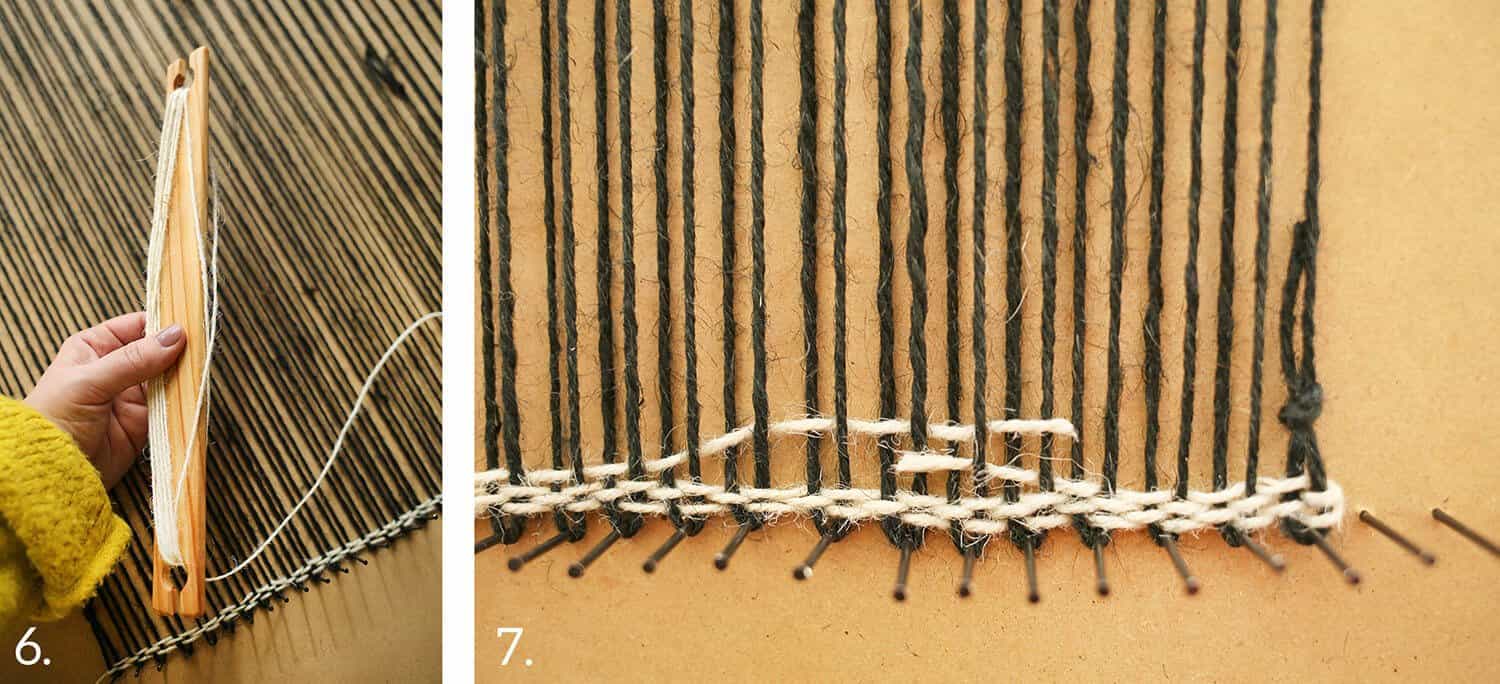 Step Six: For larger blocks of the same color, load up your stick shuttle with much more yarn. Start by pinching the yarn against the center of the stick shuttle with your thumb (mine is on the back side in this photo), and then wrapping around the left side of your stick shuttle in a figure eight pattern for a total of 10 times.
Then start wrapping a figure eight pattern on the right side of your stick shuttle another 10 times. Then leave yourself a 4-foot tail to add even more length before cutting your jute from the ball. This large stick shuttle acts as a needle but keeps you from getting tangled up in your jute.
Step Seven: Start weaving with your stick shuttle so that you share at least two warp rows as the weft row underneath. Then continue on so that you are repeating the same over and under pattern. If you get confused, just make sure you are weaving the opposite of the weft row underneath.
Be sure you use your comb or fork to push each weft row down as firmly as possible to get the sturdiest mat possible. Keep weaving until you run out or have a 1.5″ woven block of color.
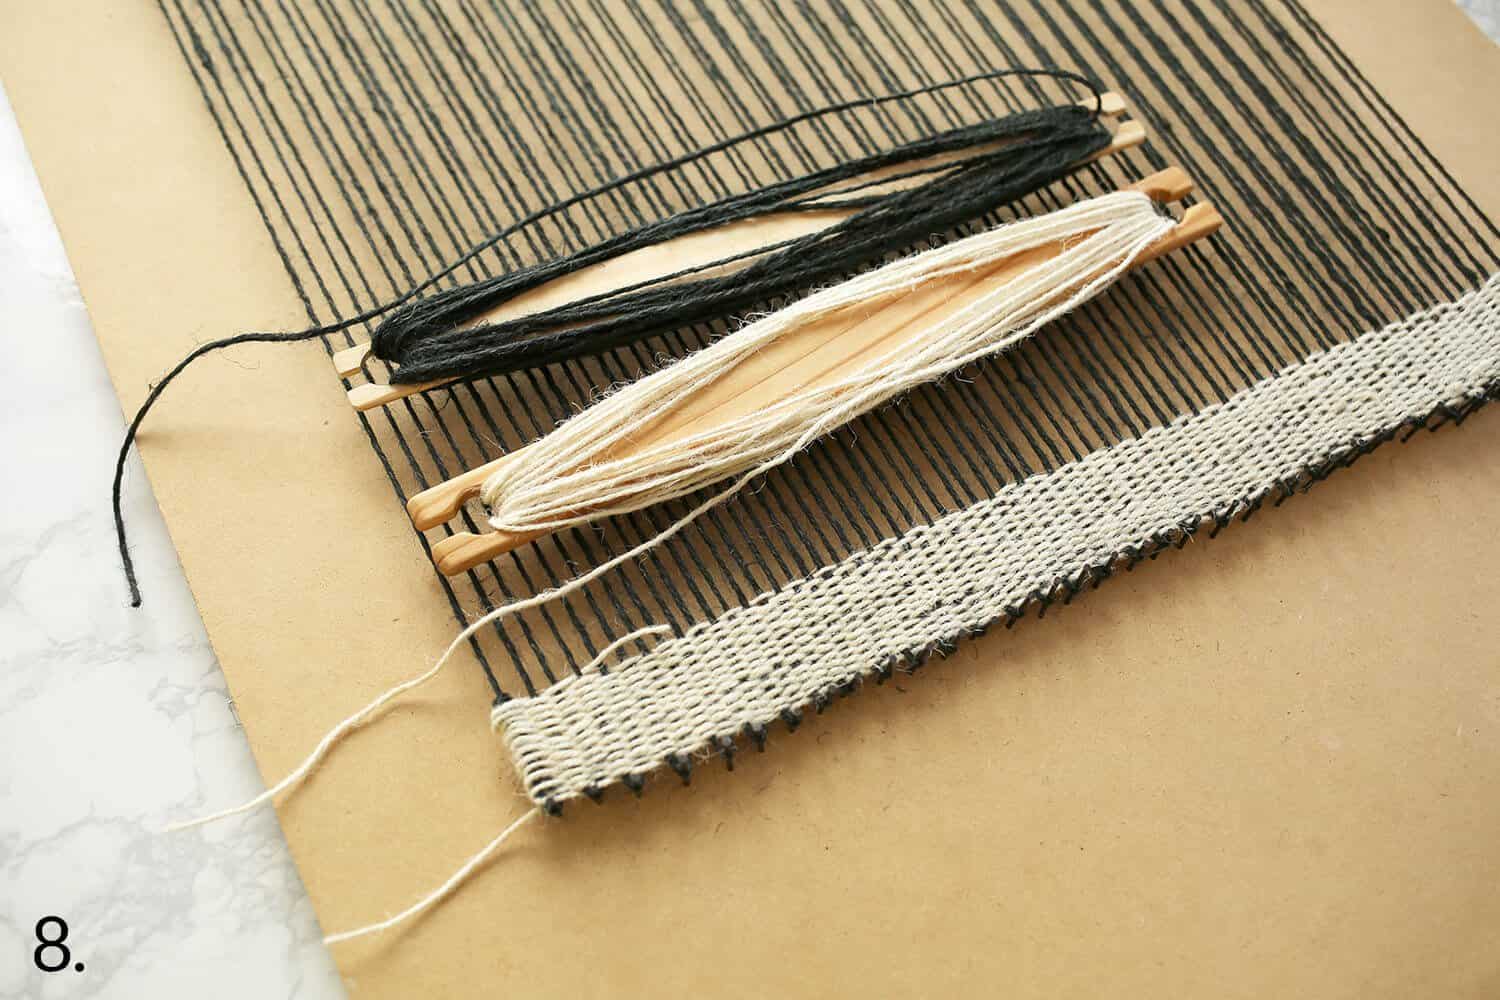 Step Eight: For your next section, you’ll need to load up one stick shuttle with cream jute (10 times on each side) and one stick shuttle with black jute (10 times on each side).
 Step Nine: This is the start of your pick and pick section. Add one row of plain weave (over, under, over, under) in the cream color. Once you’ve finished one weft row, set your cream aside.
Then starting from the same side as your cream stick shuttle, weave one row of plain weave (under, over, under, over) in black and then set it aside. You can see in the photo above that the cream ended under and the black ended over.
Step Ten: Pick up your cream stick shuttle and make sure it goes over the black yarn from the stick shuttle. Then start weaving in the opposite direction so that you are still weaving the opposite from the last weft row (the black). This means all of your cream overs will show on the same warp rows.
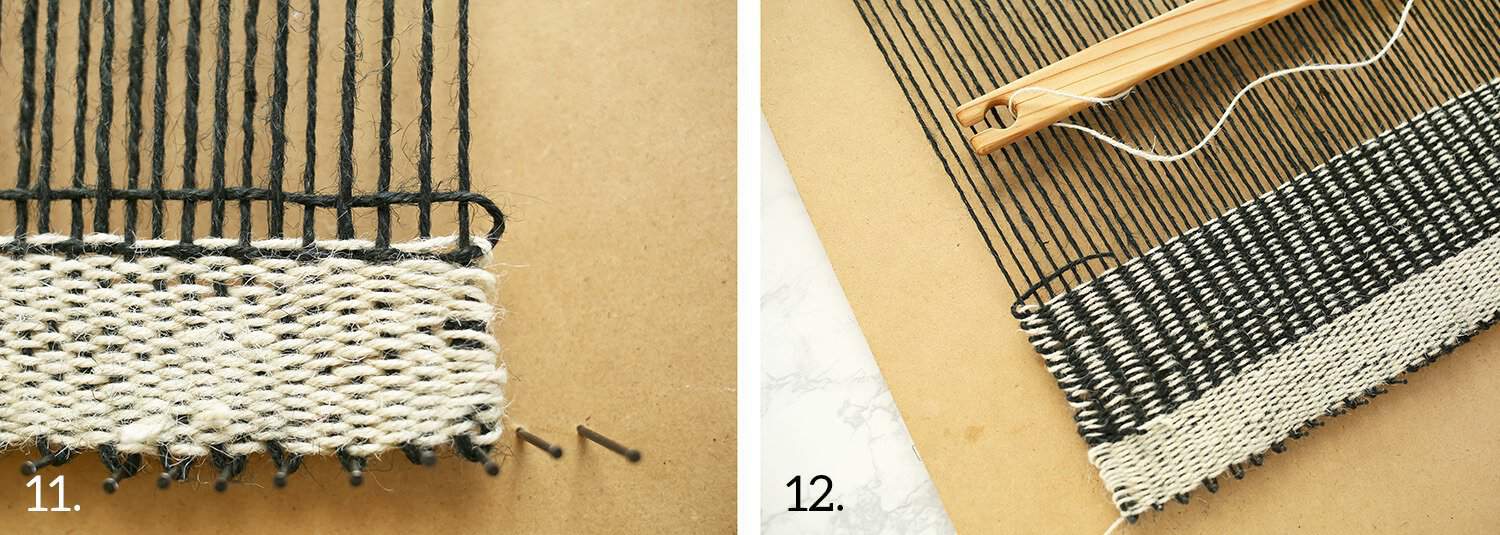 Step Eleven: Pick up your black stick shuttle and start weaving your next weft row. It should be the opposite pattern of the cream weft row but the same pattern as the black weft row.
This means all of the black overs will share the same warp rows and show up on the front. The place where the cream and the black jute overlap on the outside of the warp row should not pull too tightly in or stick too far out. Eventually these will become very consistent.
Step Twelve: Continue weaving using the pick and pick technique until you finish one last weft row of cream. Then weave in a few warp rows of the black to secure it. Remember to use your comb or fork to keep beating your weft rows down evenly.
To continue the same pattern as the project:
-plain weave about 1″ of cream jute using your stick shuttle.
-cut 4′ of pink jute and weave two rows of plain weave.
-plain weave about 1″ of cream jute using your stick shuttle.
-load one stick shuttle with cream jute and one stick shuttle with natural jute. Weave 2″ of pick and pick.
-plain weave about 1″ of cream jute using your stick shuttle.
-cut 4′ of pink jute and weave two rows of plain weave.
-plain weave about 1″ of cream jute using your stick shuttle.
-load one stick shuttle with cream jute and one stick shuttle with black jute. Weave until you run out and then reload each stick shuttle. Continue weaving until you have about 6″ of black and cream pick and pick. This is the center of your mat.
-plain weave about 1″ of cream jute using your stick shuttle.
-cut 4′ of pink jute and weave two rows of plain weave.
-plain weave about 1″ of cream jute using your stick shuttle.
-load one stick shuttle with cream jute and one stick shuttle with natural jute. Weave 2″ of pick and pick.
-plain weave about 1″ of cream jute using your stick shuttle.
-cut 4′ of pink jute and weave two rows of plain weave.
-plain weave about 1″ of cream jute using your stick shuttle.
-load one stick shuttle with cream jute and one stick shuttle with black jute. Weave 2″ of black and cream pick and pick.
-plain weave about 1″ of cream jute using your stick shuttle (or as close as you can get to 1″). You want to make sure you have about 2″ of room until you get to the top of your nails.
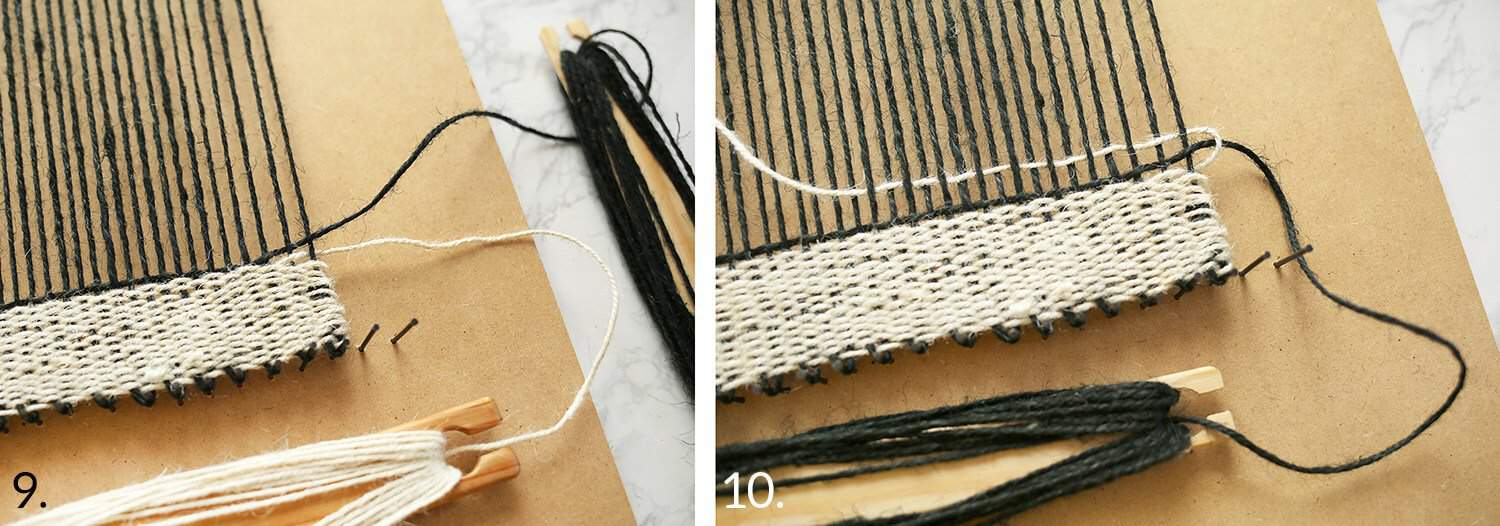
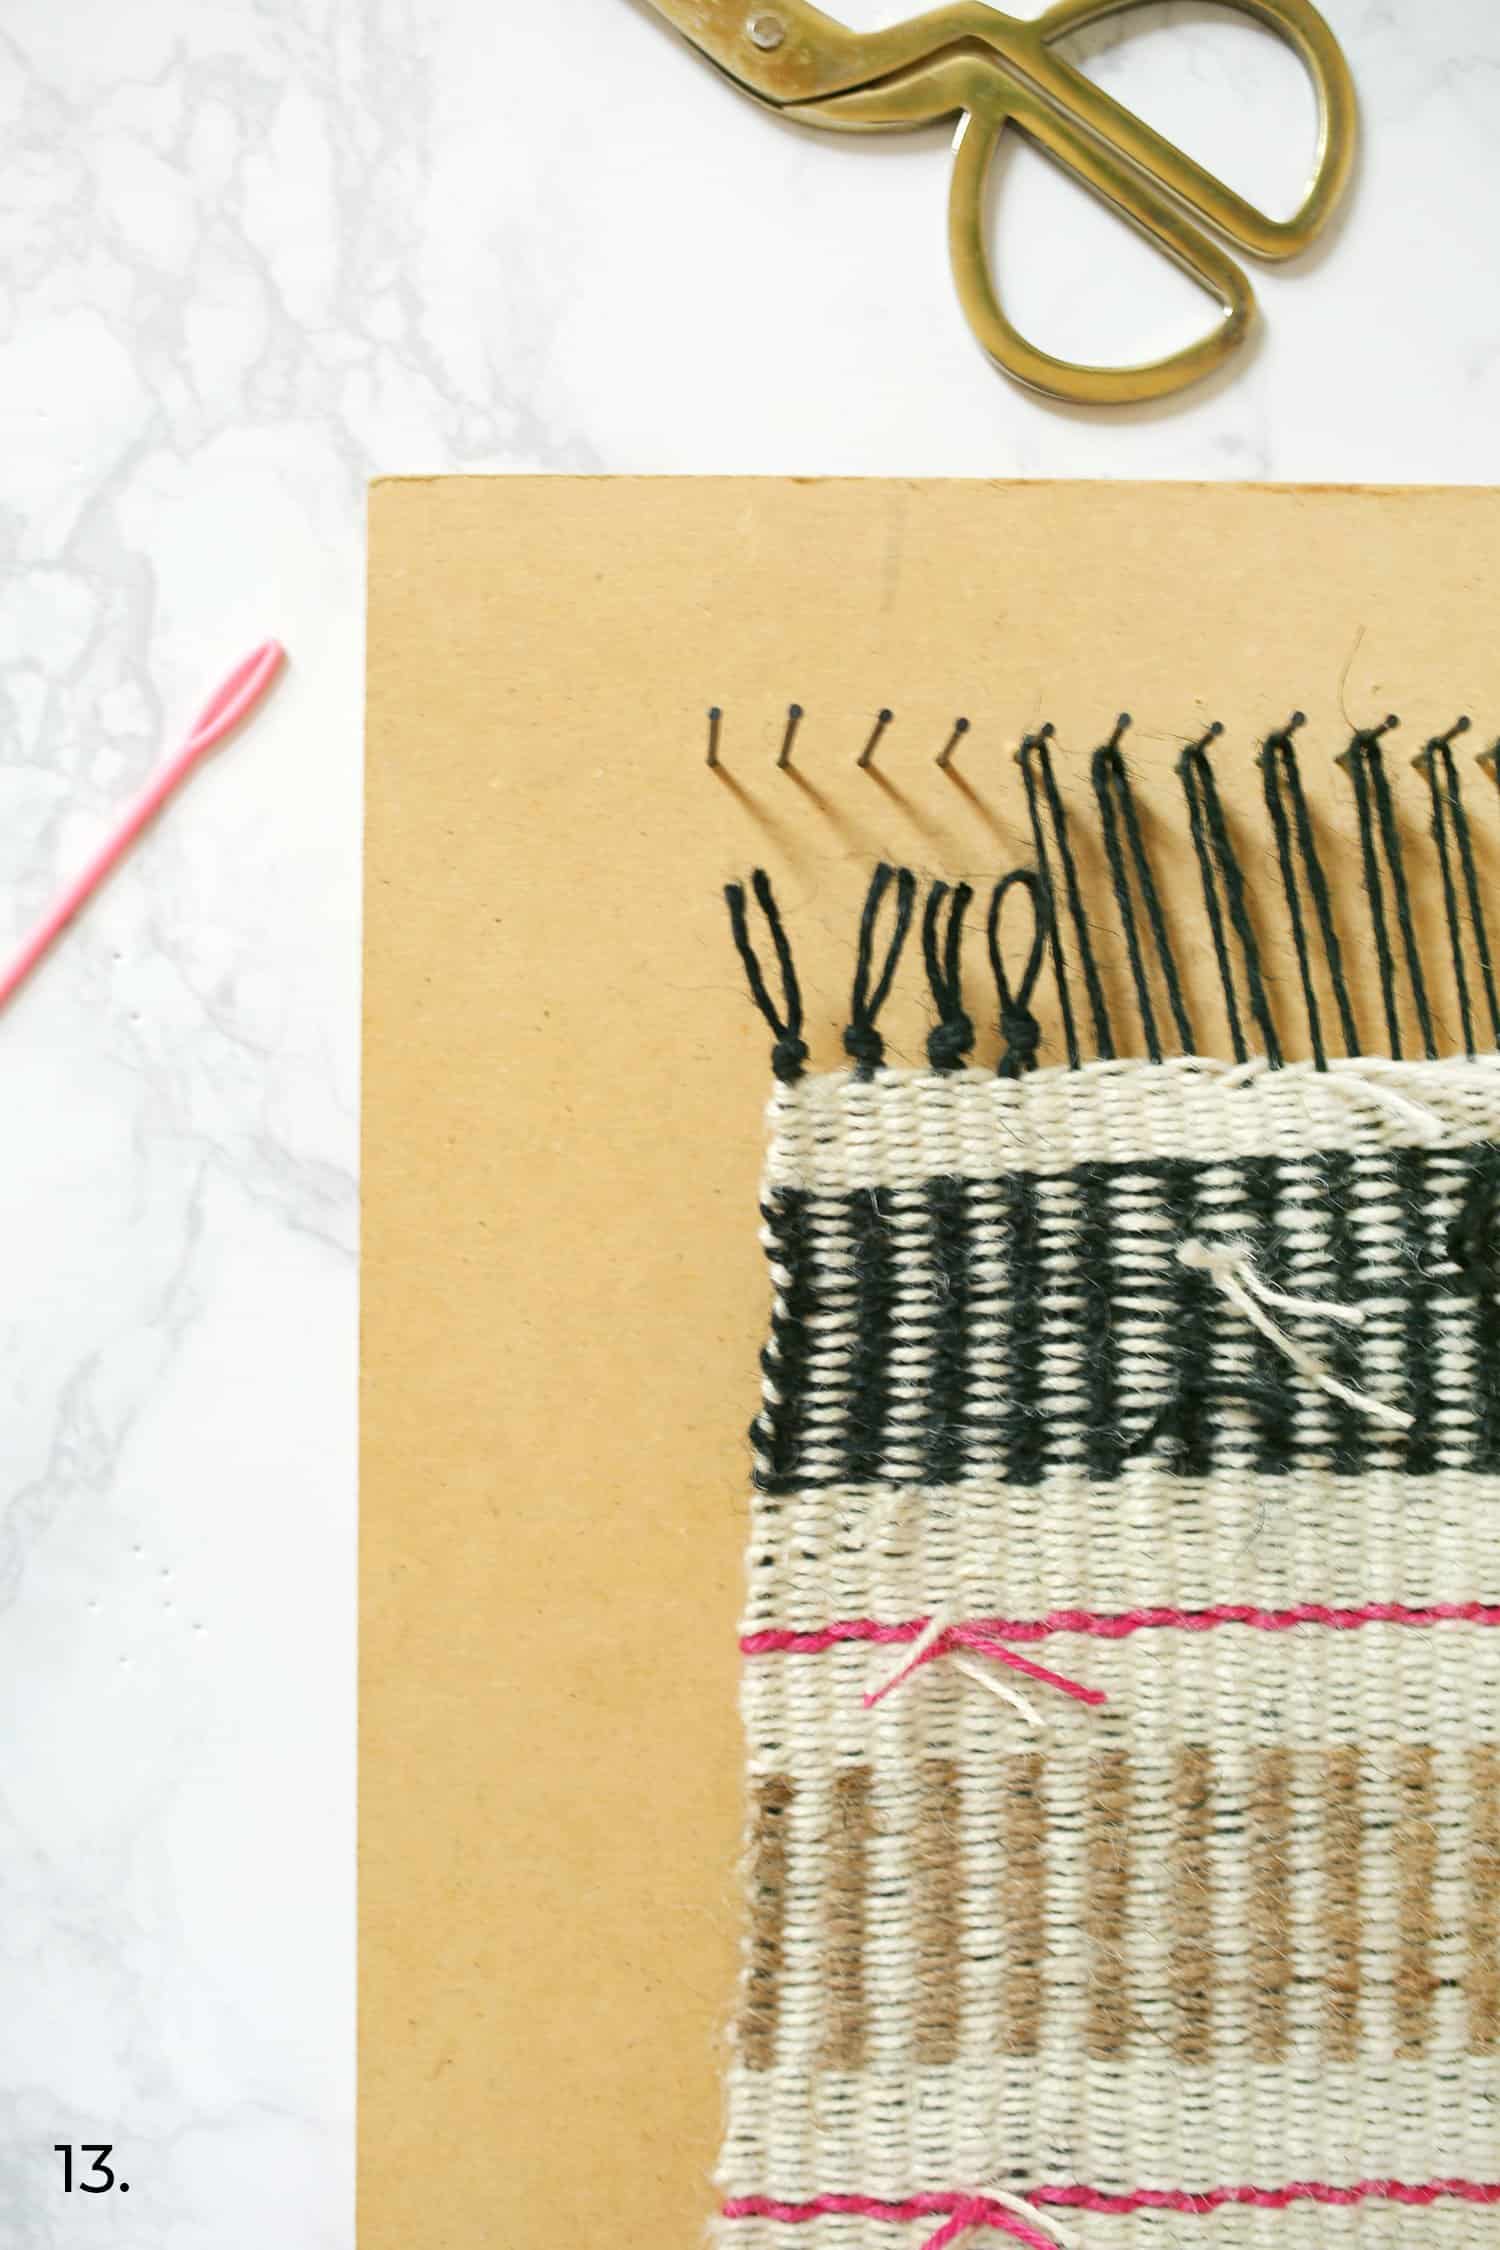 Step Thirteen: Once you’ve reached the top (hooray!!!) then gently pull your warp rows off—two at a time. Tie each looped pair together in a knot and then cut your loop at the top so that you end up with two short strands. Continue all the way across.
To achieve the tasseled loop on the other end, cut 33 6″ strips of black jute. As you remove a pair of warp rows from the bottom nails, stitch a strip of black jute through the warp loop (where the nail was) pull the ends together, and tie a knot. Repeat all the way across the bottom row of warp row loops.
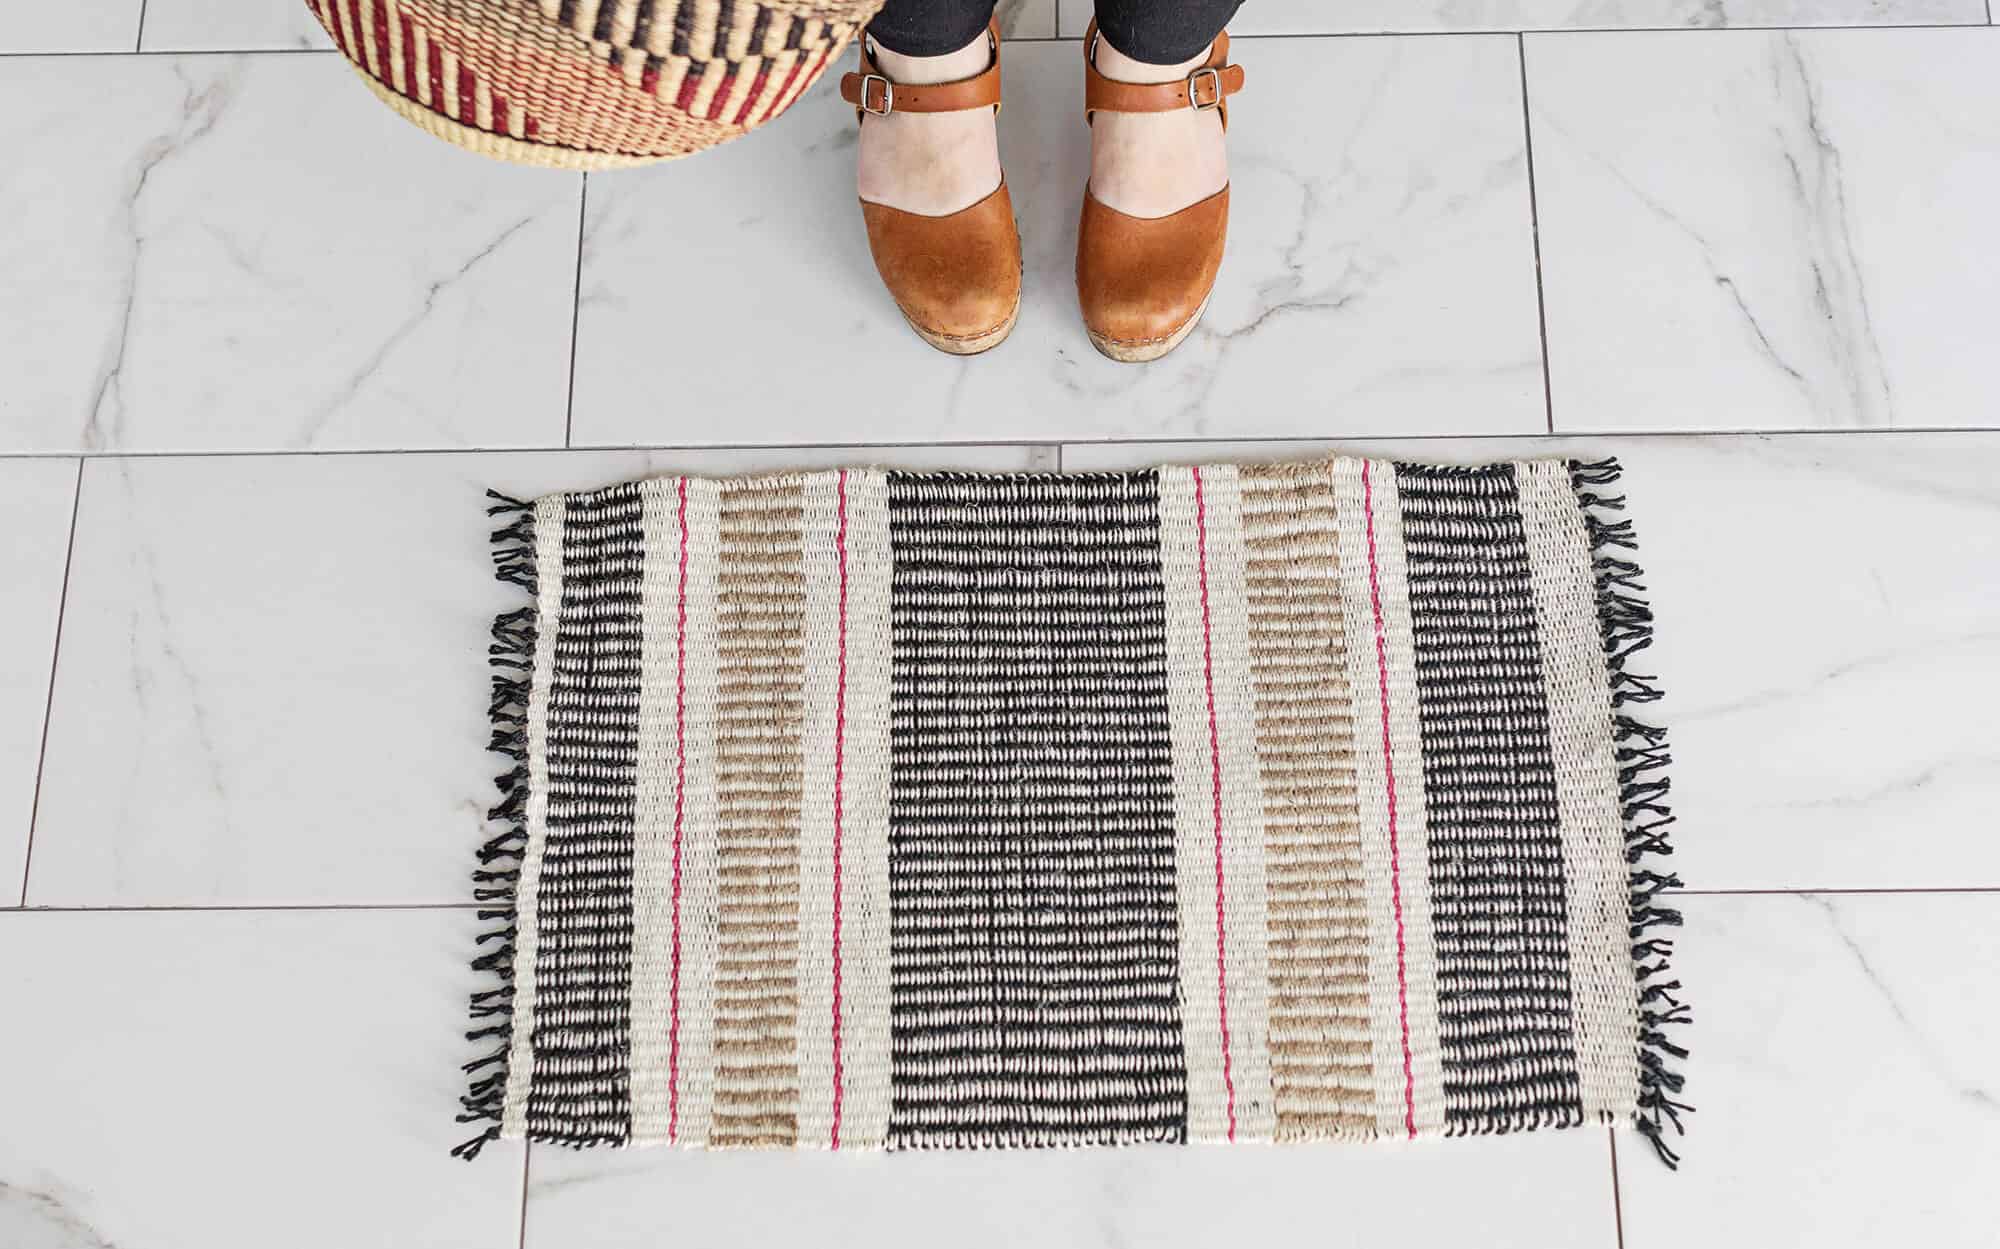
 Phew! If you’ve made it this far, you should probably earn a weaving merit badge. Your finished project should look like the one below, but feel free to substitute your favorite colors of jute yarn.
 I’m not going to lie, this project took about 12 hours total. It’s a very dense project with thin jute, so the progress felt slow but it looks like something woven on a rigid heddle loom. Since these photos were taken, it’s actually ended up on our dining room table underneath a wooden bowl of oranges.
If you’re into this design but not into the time commitment, try the pick and pick technique on a set of coasters! You can use a smaller frame loom to weave one coaster, skip about 4″ of space, and then weave another coaster on the same set of warp rows. You’re welcome.
I can’t wait to see who accepts this weaving challenge! – Rachel
Interested in learning more about weaving basics? Check out my book, DIY Woven Art, for 15 projects with lessons that build on each other.

Woven jute mats are an easy craft project and the finished product adds a lot of character to any room. Of course, if you don’t want to make these mats yourself, you can easily buy them. However, making them yourself can be very rewarding.
This is amazing and beautiful. I cannot wait to have enough weaving practice, practice, practice to make this myself. Thank you Rachel!
That mat looks so cool, I would never think that it’s self-made! I would love to try my hand at weaving sometime!
https://www.makeandmess.com/
So glad you used it in your dining space!! It’s so beautiful; I would never want to put my feet on it. 🙂
Right?! Too many hours spent on this thing to then have it ruined by a muddy shoe! Thanks, lady!
This is incredible! I saw the hammer and got nervous but it was just for the setup (phew!). I used to latch hook when I was younger and found it to be so exciting and therapeutic. This looks considerably more challenging though! Can’t believe you made that!
Eva | www.shessobright.com
Wow, this looks like such a therapeutic process! I think I will start with the coasters and work my way up – the perfect end of winter problem!
Holly from The Art of Being Holly xo
Great job, Rachel! It’s so pretty!
Thanks, Janae!
I absolutely love this, its gorgeous!! I am super excited to try this myself, thanks for the fantastic tutorial!!
I love this, the colors are so perfect! I would need some practice but I’m willing to try this out!
Wow, can’t believe you made that! I want to try it one day!
That mat is amazing, and I’m crushing hard on those clogs!
Paige
http://thehappyflammily.com
what a fun weaving project!!! I would love to do something like this.
http://modaodaradosti.blogspot.ba/
I love the look of the mat – but I don’t think I’d be able to handle the DIY process myself, I’m such a newbie! Haha! 🙂
Charmaine Ng | Architecture & Lifestyle Blog
http://charmainenyw.com
Yeah, this one is pretty intense! So glad you love how it turned out, though!