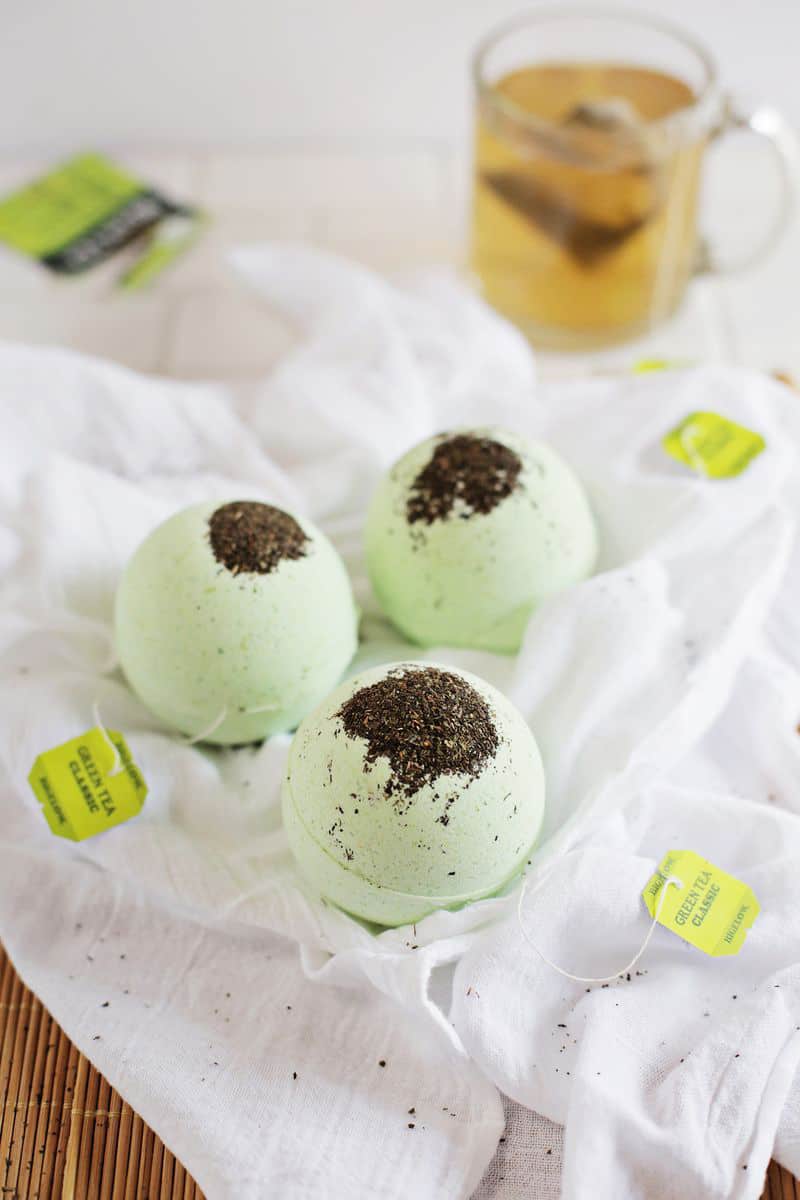
With perpetually cold fingers and toes (no really, ask my husband—it’s a problem!), there’s really nothing quite like a hot bath to warm you up. Except maybe a hot bath accompanied by some reading, hot tea, and a delicious smelling homemade bath bomb!
I recently made these green tea and lemon bath bombs. They are SO fun to use and pretty easy to make.
Related: How to make basic Homemade Bath Bombs
Some of you might remember last winter when I shared my foolproof method for making your own bath bombs at home. The method is exactly the same (but I’ll go ahead and repeat it here in case you don’t feel like clicking over), but the ingredients have changed slightly.
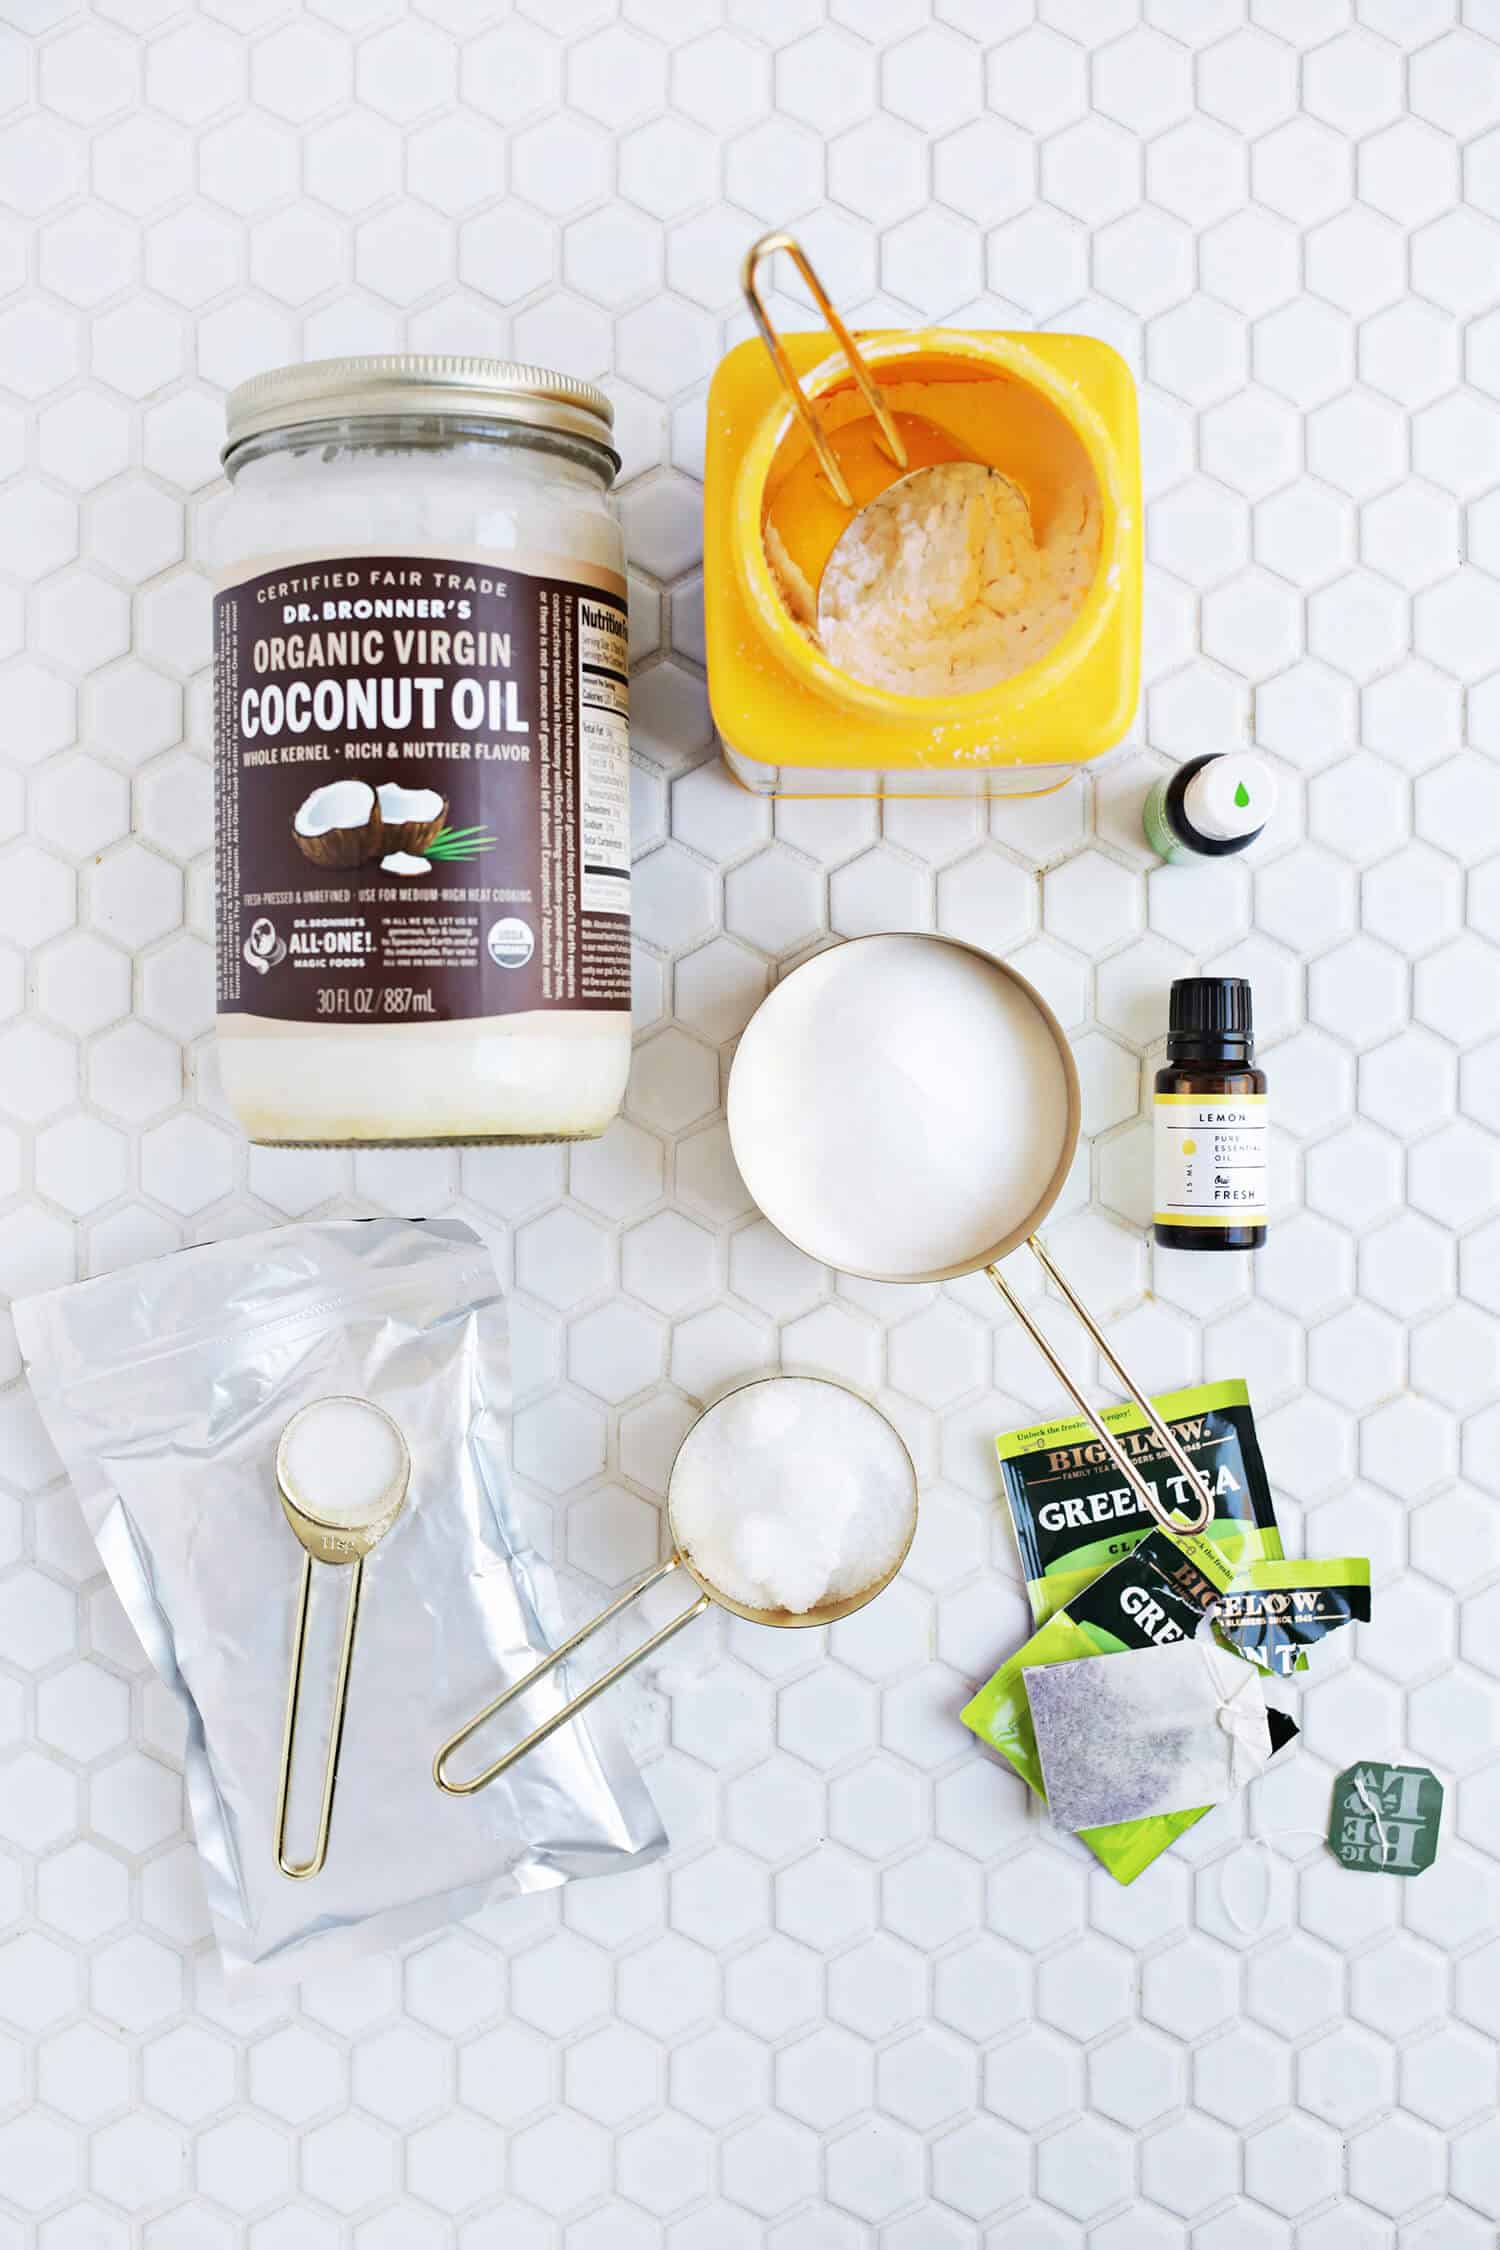
Other than the essential oil and molds, you can pretty much find all these ingredients at a regular grocery store, or at least I was able to.

8 oz. baking soda
4 oz. corn starch
4 oz. citric acid
4 oz. epsom salt
3 teaspoons water
1 teaspoon lemon essential oil
2 teaspoons coconut oil
2-3 drops of green food coloring (optional)
3-4 bags of green tea
bath bomb molds
mixing bowl
This will make 3-4 bath bombs depending on your mold size.
In a bowl, combine the dry ingredients (the first four listed above). Whisk to remove any clumps; corn starch tends to be clumpy. In a small glass jar stir together the wet ingredients (water, essential oil, coconut oil, and food coloring if using).
If you’re using coconut oil, give it a quick melt in the microwave or on the stovetop first so it will more easily combine with the other ingredients.
Slowly pour the liquid mixture in with the dry mixture, whisking as you go. If you see the mixture fizz or foam, you may be adding the liquid too quickly.
Once all the wet ingredients are combined with the dry, take a small amount in your hand and squeeze it together.
It should stick together fairly well in one or two big chunks. If it’s still too powdery to hold together, just add a tiny bit more water and mix until it does hold together.
Then, fill each half of your bath bomb molds with some of the green tea leaves and then the mixture until it’s overflowing just a little. Press together, then gently remove one side of the mold. Place the bath bomb on a tray and allow to dry out just a little (10-12 minutes) before removing the other side.
As you can see in the photo above, I set the side that still had half the mold (the bottom) on top of some baking soda so it would not roll around my work surface as it dried.
Once you are ready to remove the other side, gently invert the bath bomb so the uncovered side is facing down, then gently remove the other half of the mold from the top. The keyword, if you haven’t noticed, is gently. These can fall apart on you very easily if you’re not careful.
If a bath bomb does crack in half while you’re removing it, you can gently press it back on top of the other half, or move all the mixture back to the mixing bowl and start the molding process again. I had this happen to a few, so don’t fret. It’s easy to fix.
Here’s a quick video tutorial:
Once they are completely out of the mold, allow them to dry out for 8 hours or overnight. Once very dry, you can wrap them in plastic wrap or wax paper and store in a dry spot until you want to use them.
I put the green tea string tags in the side of my bath bombs just because I thought it was cute. Then when I wrapped them in wax paper to store them, I left the tag sticking out.
Some of the dry green tea leaves may sprinkle off as you unmold or wrap these to store, but no biggie. If you want to try to avoid this though, you can mix the green tea into the mixture before molding. Up to you.
The green tea leaves are similar to adding dried flower buds, you likely will need to rinse or wipe down your bathtub after enjoying. This only takes about a minute if you have a glass handy (I just enjoyed one of these the other night and was able to rinse out my tub in less than a minute).
But, if you really can’t stand the extra work, you could mix in a teaspoon of matcha green tea powder instead of using tea leaves.
Either way, I think you deserve an at home spa day. 🙂 And if you love bath bombs, check out these 6-must-have bath products owned by Latina brands! Enjoy! xo. Emma
Love this post? Sign up for our newsletter for more ideas!

Get creative ideas for recipes, crafts, decor, and more in your inbox!
 Get the How-To
Supplies
- 8 oz. baking soda
- 4 oz. corn starch
- 4 oz. citric acid
- 4 oz. epsom salt
- 3 teaspoons water
- 1 teaspoon lemon essential oil
- 2 teaspoons coconut oil
- 2-3 drops of green food coloring (optional)
- 3-4 bags of green tea (any brand you prefer)
Equipment
- mixing bowl
- molds
Instructions
- In a bowl, combine the dry ingredients (the first four listed above). Whisk to remove any clumps; corn starch tends to be clumpy. In a small glass jar stir together the wet ingredients (water, essential oil, coconut oil, and food coloring if using). If you’re using coconut oil, give it a quick melt in the microwave or on the stovetop first so it will more easily combine with the other ingredients.
- Slowly pour the liquid mixture in with the dry mixture, whisking as you go. If you see the mixture fizz or foam, you may be adding the liquid too quickly. Once all the wet ingredients are combined with the dry, take a small amount in your hand and squeeze it together. It should stick together fairly well in one or two big chunks. If it’s still too powdery to hold together, just add a tiny bit more water and mix until it does hold together.
- Then, fill each half of your bath bomb molds with some of the green tea leaves and then the mixture until it’s overflowing just a little. Press together, then gently remove one side of the mold. Place the bath bomb on a tray and allow to dry out just a little (10-12 minutes) before removing the other side. I set the side that still had half the mold (the bottom) on top of some baking soda so it would not roll around my work surface as it dried.
- Once you are ready to remove the other side, gently invert the bath bomb so the uncovered side is facing down, then gently remove the other half of the mold from the top. The keyword, if you haven’t noticed, is gently. These can fall apart on you very easily if you’re not careful. If a bath bomb does crack in half while you’re removing it, you can gently press it back on top of the other half, or move all the mixture back to the mixing bowl and start the molding process again. I had this happen to a few, so don’t fret. It’s easy to fix.
- Once they are completely out of the mold, allow them to dry out for 8 hours or overnight. Once very dry, you can wrap them in plastic wrap or wax paper and store in a dry spot until you want to use them.I put the green tea string tags in the side of my bath bombs just because I thought it was cute. Then when I wrapped them in wax paper to store them, I left the tag sticking out.


I Just love these collections thanks for sharing this article with us.
Thanks for giving the description of making homemade bath bomb, i will definitely try it at home and it so much cheaper then a spa or having to buy a bath bomb.
These look so good! It’s so cold at the moment i’ve been having loads of hot baths! I can’t wait to try making these
Hannah x
Http://crafternooncabaretclub.com
I have got to make some of these, I bet they smell amazing!
Love this!! Green tea is a detoxify-er. So it should pull impurities out of the skin as well. :D. I love how yours look like the fancy LUSH brand ones.
Oooh these look amazing!
Jemima x
anotherrantingreader.blogspot.co.uk
I am definitely going to try this. I’ve always been a little skeptical of homemade bath bombs, but you make it look pretty simple! I’ve been addicted to Lush bath bombs, but I’ve recently found myself being rather irritated in an area that is not fun to be irritated in, and I’m sure it’s due to that. Not to mention, and this is going to sound silly, but I didn’t realize how much I was spending on just one bath with those in them! Holy cow! http://www.enchantinglyemily.com
Wow how great are these bath bombs looking and seem easy to make. Worth the try.
I’m definitely going to try making my own bath bombs! Nothing beats a warm bath especially in the winter time! Adding a bath bomb is the cherry on top!
Sounds amazing!
Can’t wait to try this 🙂
sounds amazing,
cant wait to try this 🙂
These look awesome! http://www.hannamarielei.com
Can’t wait to try this recipe …
quite different from other “bombs’ we’ve tried thank you
I love green tea, I bet these smell amazing! I’ll have to try this soon.
Ella x
http://www.inkdreaming.com
These sound like a gorgeous combination! I’m pinning to try at some point 🙂
Jess xo
Thanks! I’ll see if I can tweak it to make it work.
Yep. You got it. You need the citric acid for the fizz effect.
-Emma
Hmm. You know, I don’t know. Mine don’t expand when I remove them from the mold. I usually wrap in plastic wrap or wax paper as opposed to zip locks so I guess I’m not 100% sure if they emit gas or not but I def didn’t notice if they did.
You might try this recipe? Maybe some ingredient you used cause them to to do this?
-Emma
Hi there! The citric acid is what makes them “fizz” so it wouldn’t quite be a bath bomb without it. It also helps your body utilize antioxidants and helps slow the aging process by revitalizing skin. I hope that is helpful! =)
You may have Raynaud’s (which is what I have!). Blood flow is limited to the extremities— think fingers, toes, ears, and nose. And if one of those areas gets cold, my whole body gets chilled to the bone! Baths are my favorite way to warm up. Love bath bombs and love knowing I can make my own at home! Thanks for the recipe! (PS – the boyfriend got me fleece slippers with rice bag inserts you can heat in the microwave. I bet you could make them yourself. I highly recommend! http://www.amazon.com/Carex-Bed-Buddy-Warming-Footies/dp/B000KBLKTO)